General Tournament Setup Guide
Before you populate and setup your tournaments in TourneyMeister, you should have identified the following initial information:
- Official name of the tournament or the event. This will be your tournament group.
- Tournament divisions or categories. These are the actual tournaments where participants register into.
- Registration period and start date of each tournament in the tournament group.
- Tournament format (round robin, single elimitation, etc).
- Number of courts, mats or venues where matches will be held.
Here is the general guide on how to setup a tournament in TourneyMeister.
- Navigate to Tournaments -> Tournament Groups. Create the tournament group. The title you give to your tournament group is important. Make sure to assign a short but descriptive title. The tournament group is a collection or a place holder of the actual tournaments. When your target audience visit the tournament group landing page, they will see the list of tournaments (e.g. divisions, categories) that they can register.
Set the status to Active when are you are ready to create the tournaments under the group. The rest of the settings are optional which you can configure later.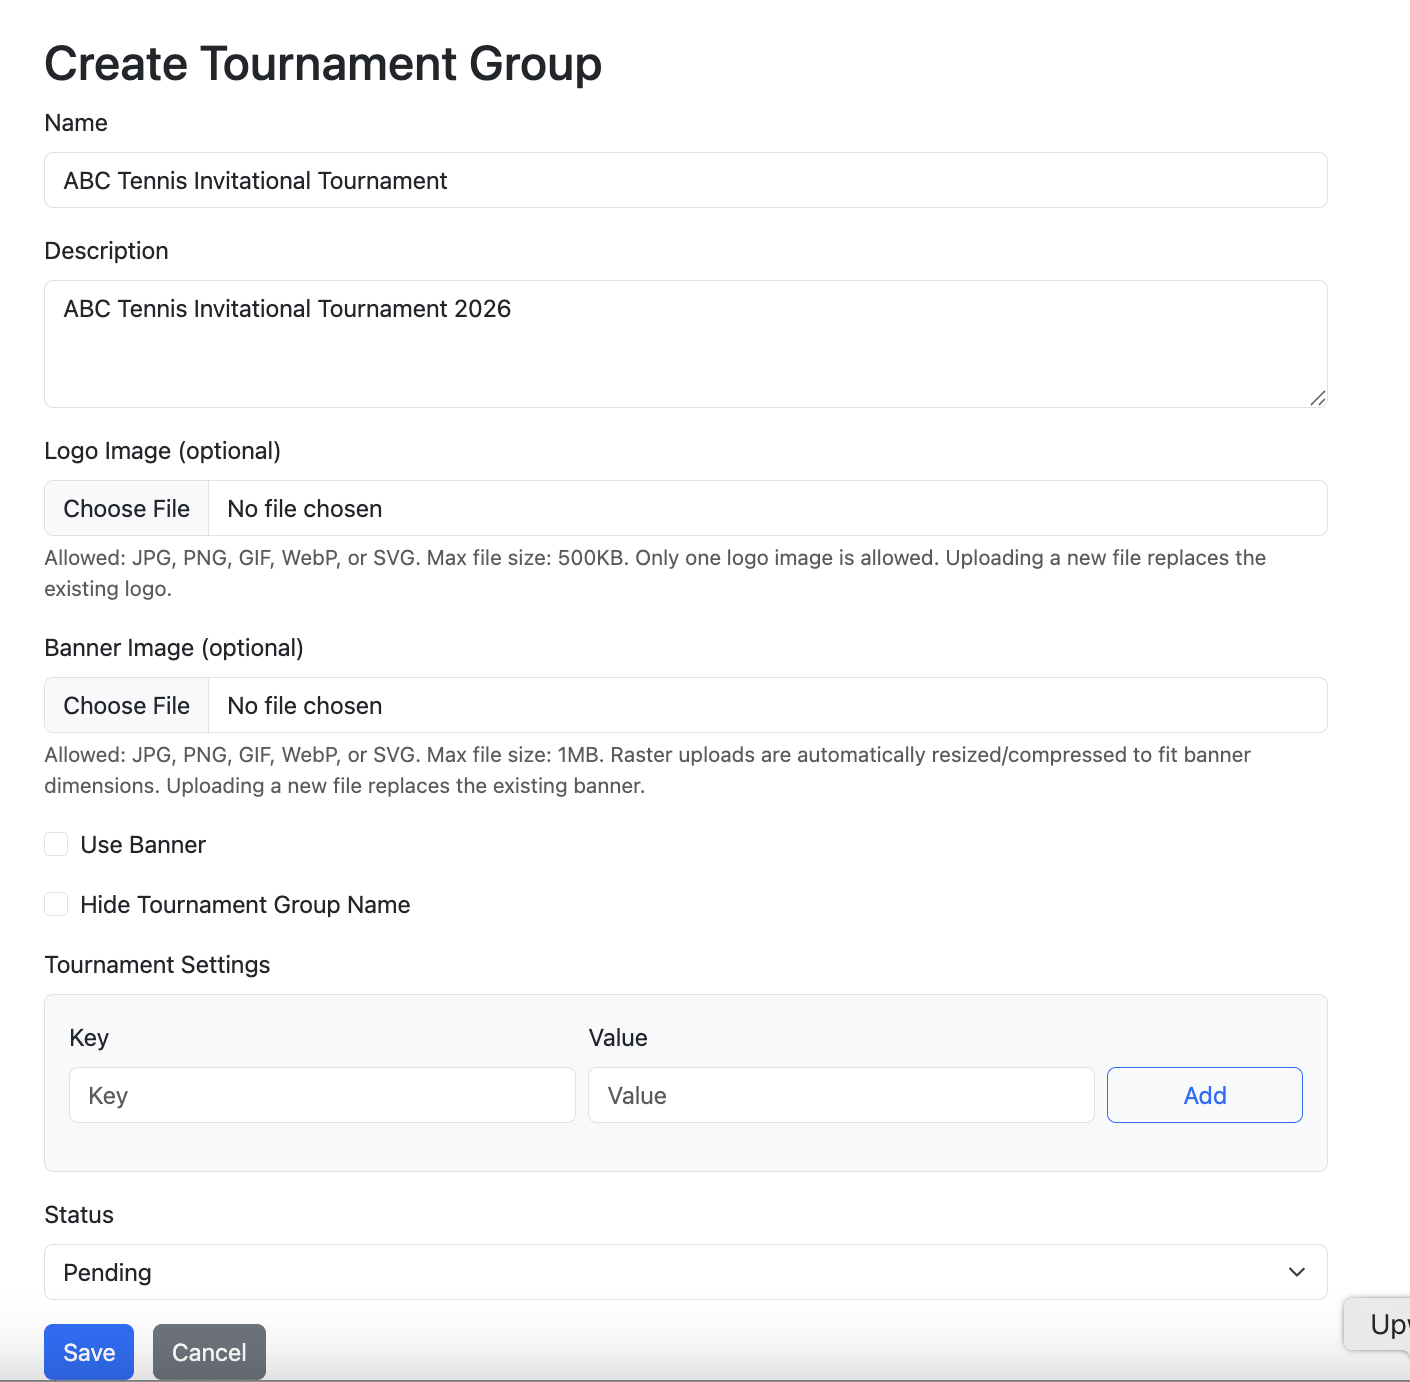
The newly created tournament group will be shown on the list of tournament groups you created.
- Navigate to Tournaments -> Tournaments. Create a tournament for each of the tournaments you have planned for. Do not worry if you make a mistake or leave the settings to their default values. You can update the settings as you go along. Make sure to select the tournament group you created in Step#.
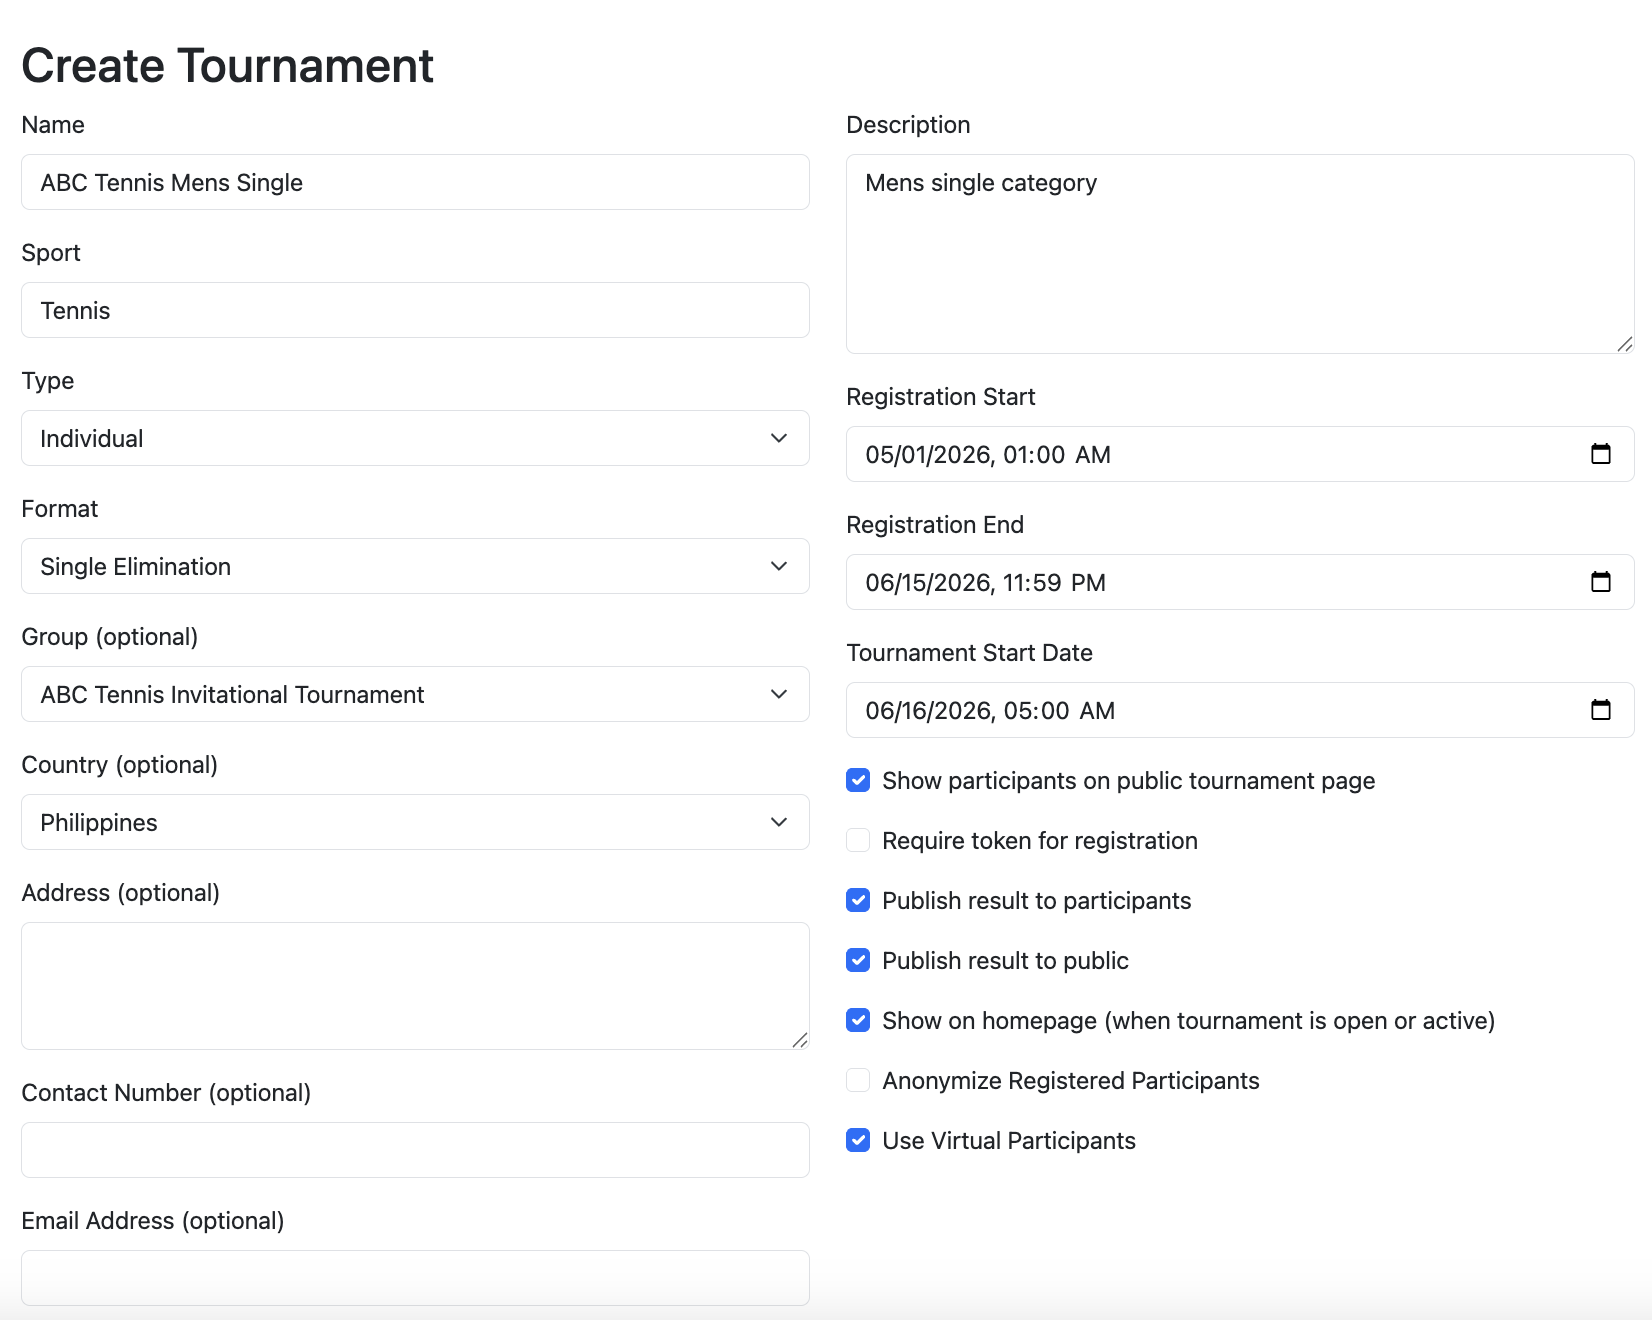
Set the status to Open when your tournament is ready to accept registrations. If you want to manually create the profiles of the participants (individual or teams) and register them yourself instead of having them create their accounts in TourneyMeister and register to their desired tournaments, tick the Use Virtual Participants checkbox.
The newly created tournament will be shown on the list of tournaments you created.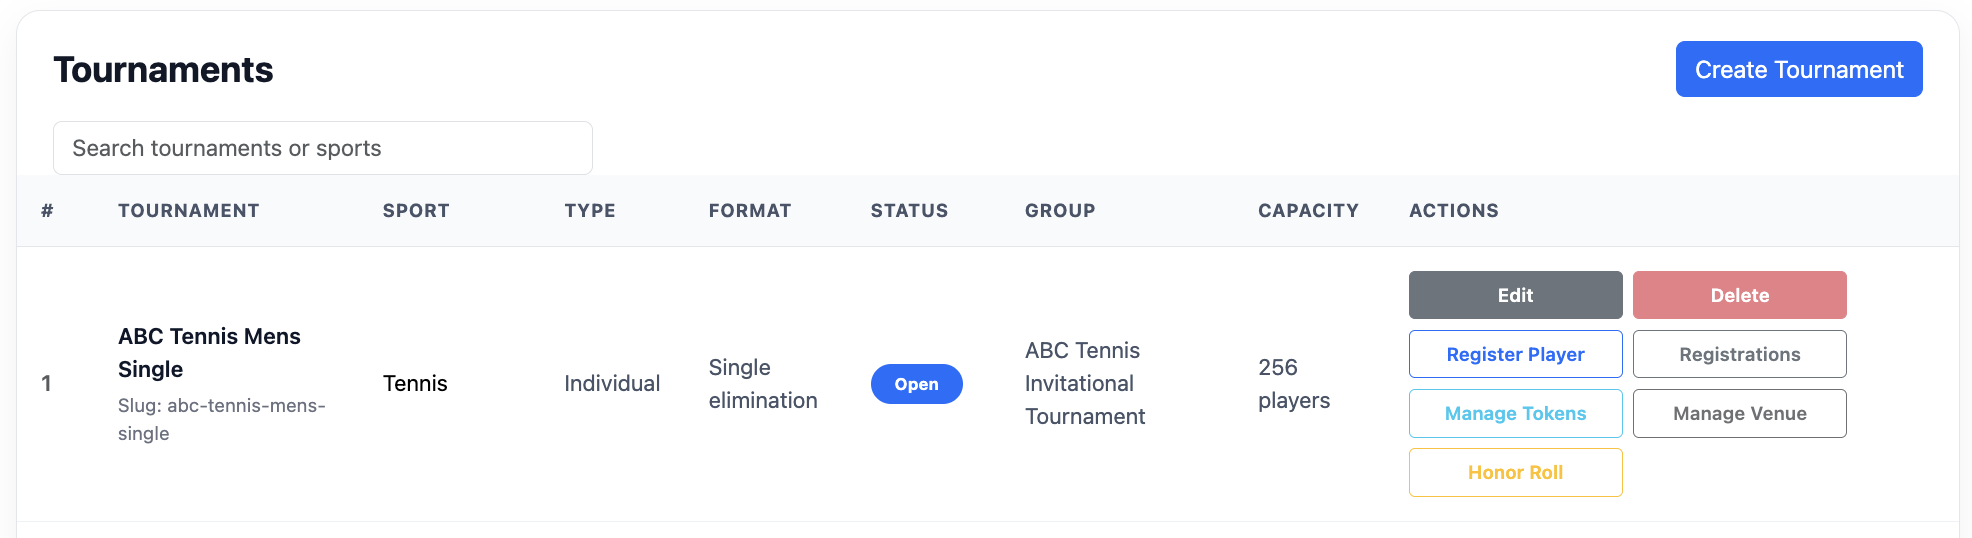
- Announce the tournament is ready to accept registrations. You can publish the URL of the tournament group landing page on your preferred communication channels like Facebook, Instagram, website or email the URL to your target participants. You can also generate and download the QR code of the tournaemnt group landing page from the tournament group QR Codes setup page and post the QR code image or share the image to your target participants.
If you want to manually create the profiles of the participants, click the Virtual Participants button under the tournament group. Virtual Participants do not have user accounts in TourneyMeister. They cannot log in and register. You will be the one to manually register the Virtual Participants to their respective tournaments. - The tournaments are open for registration once the status is set to Open and the current date is within the registration period. Participants can register from the tournament landing page as shown below.
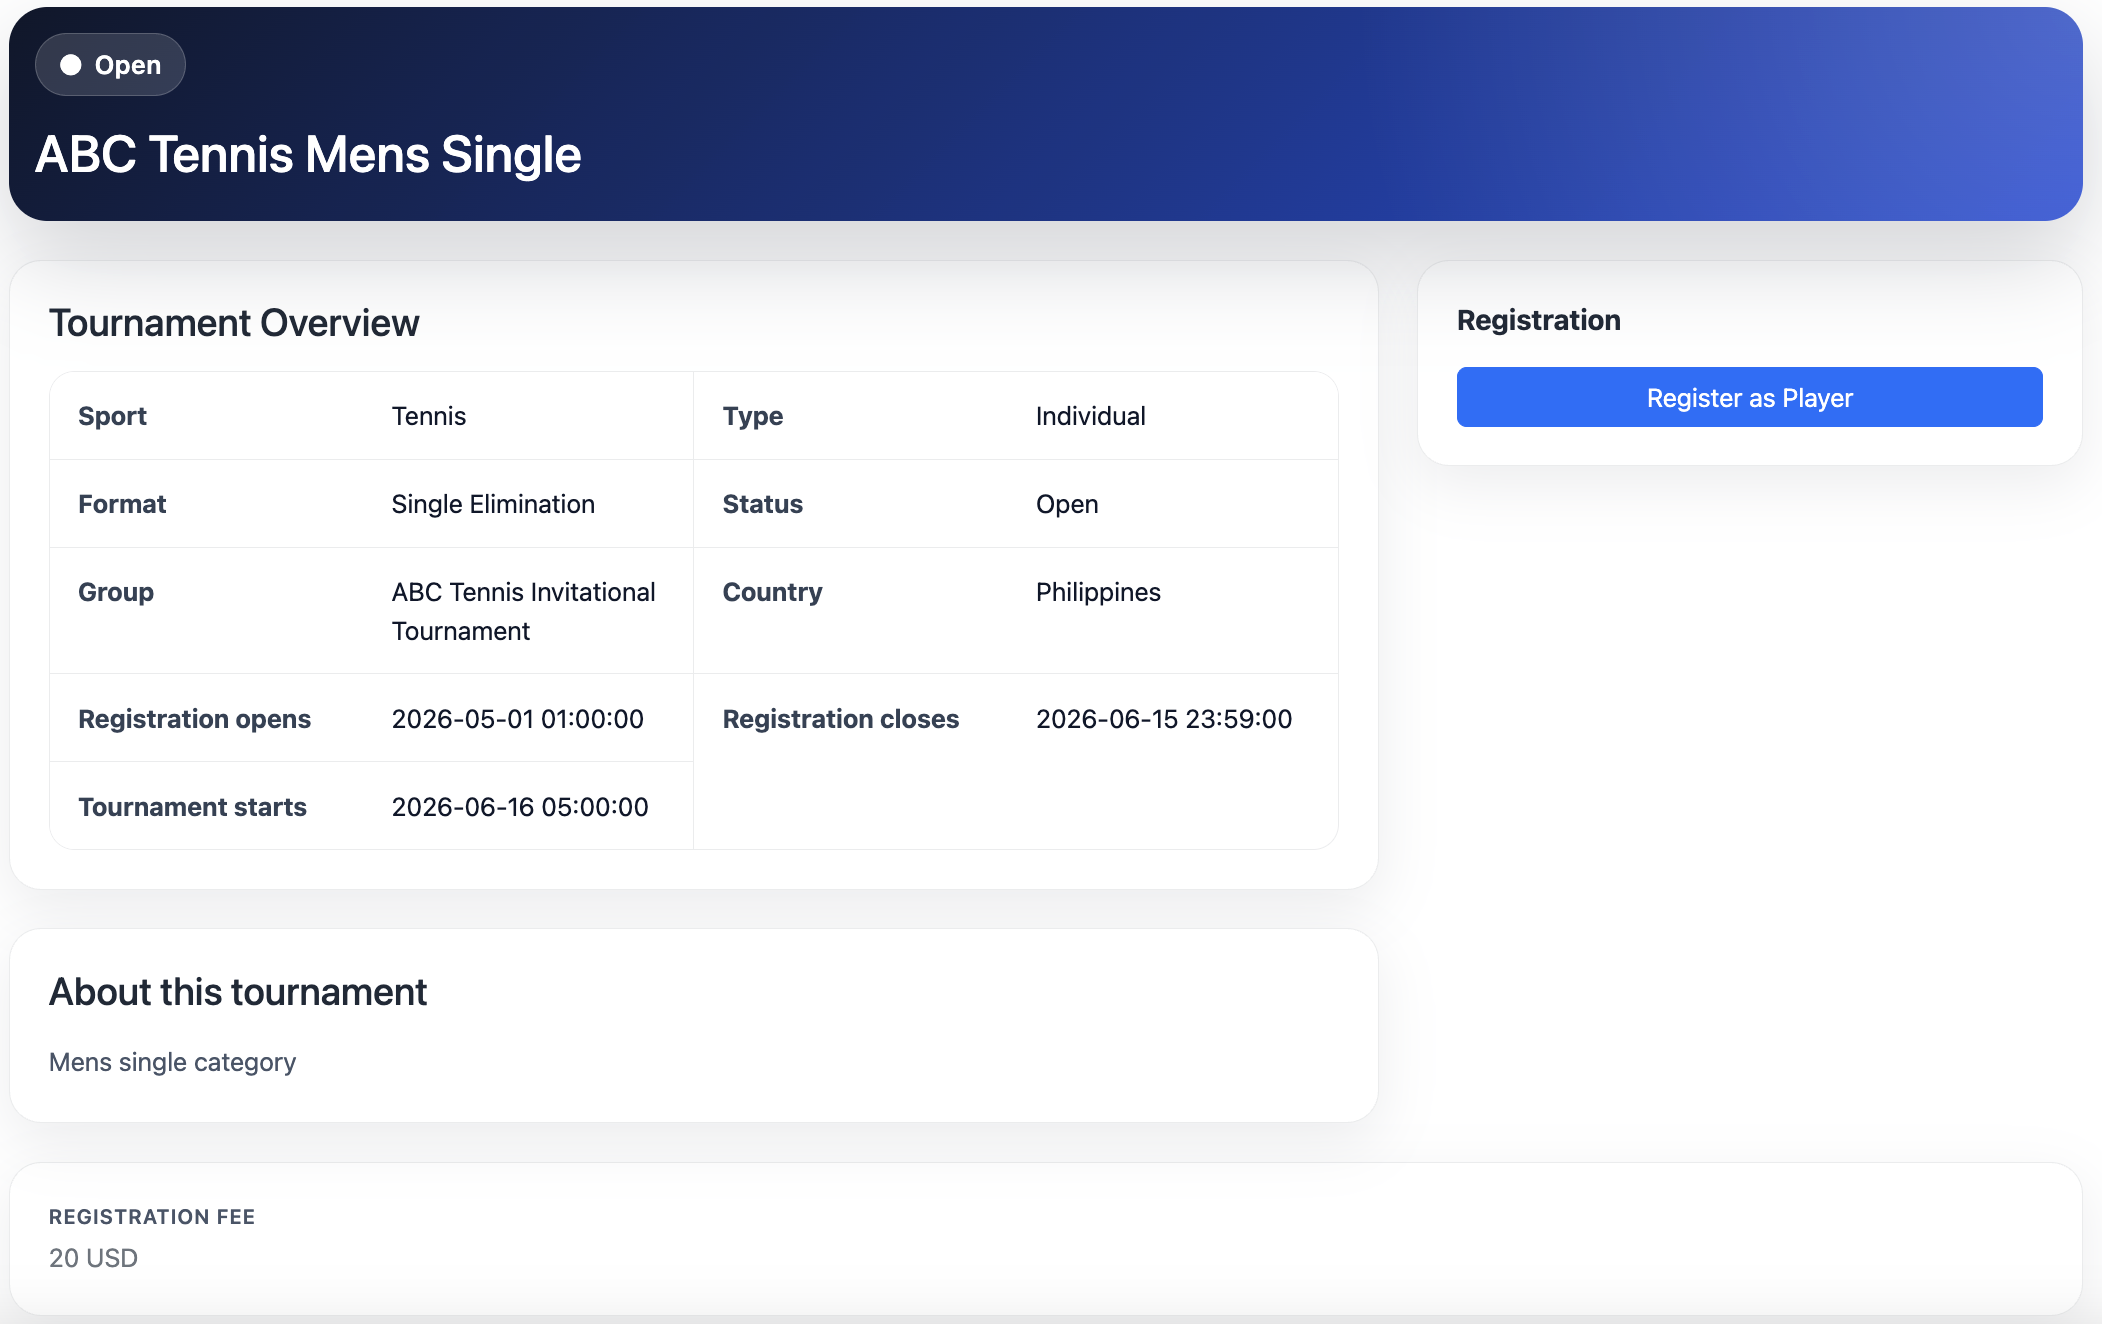
The tournaments are also listed under the tournament group landing page as shown below.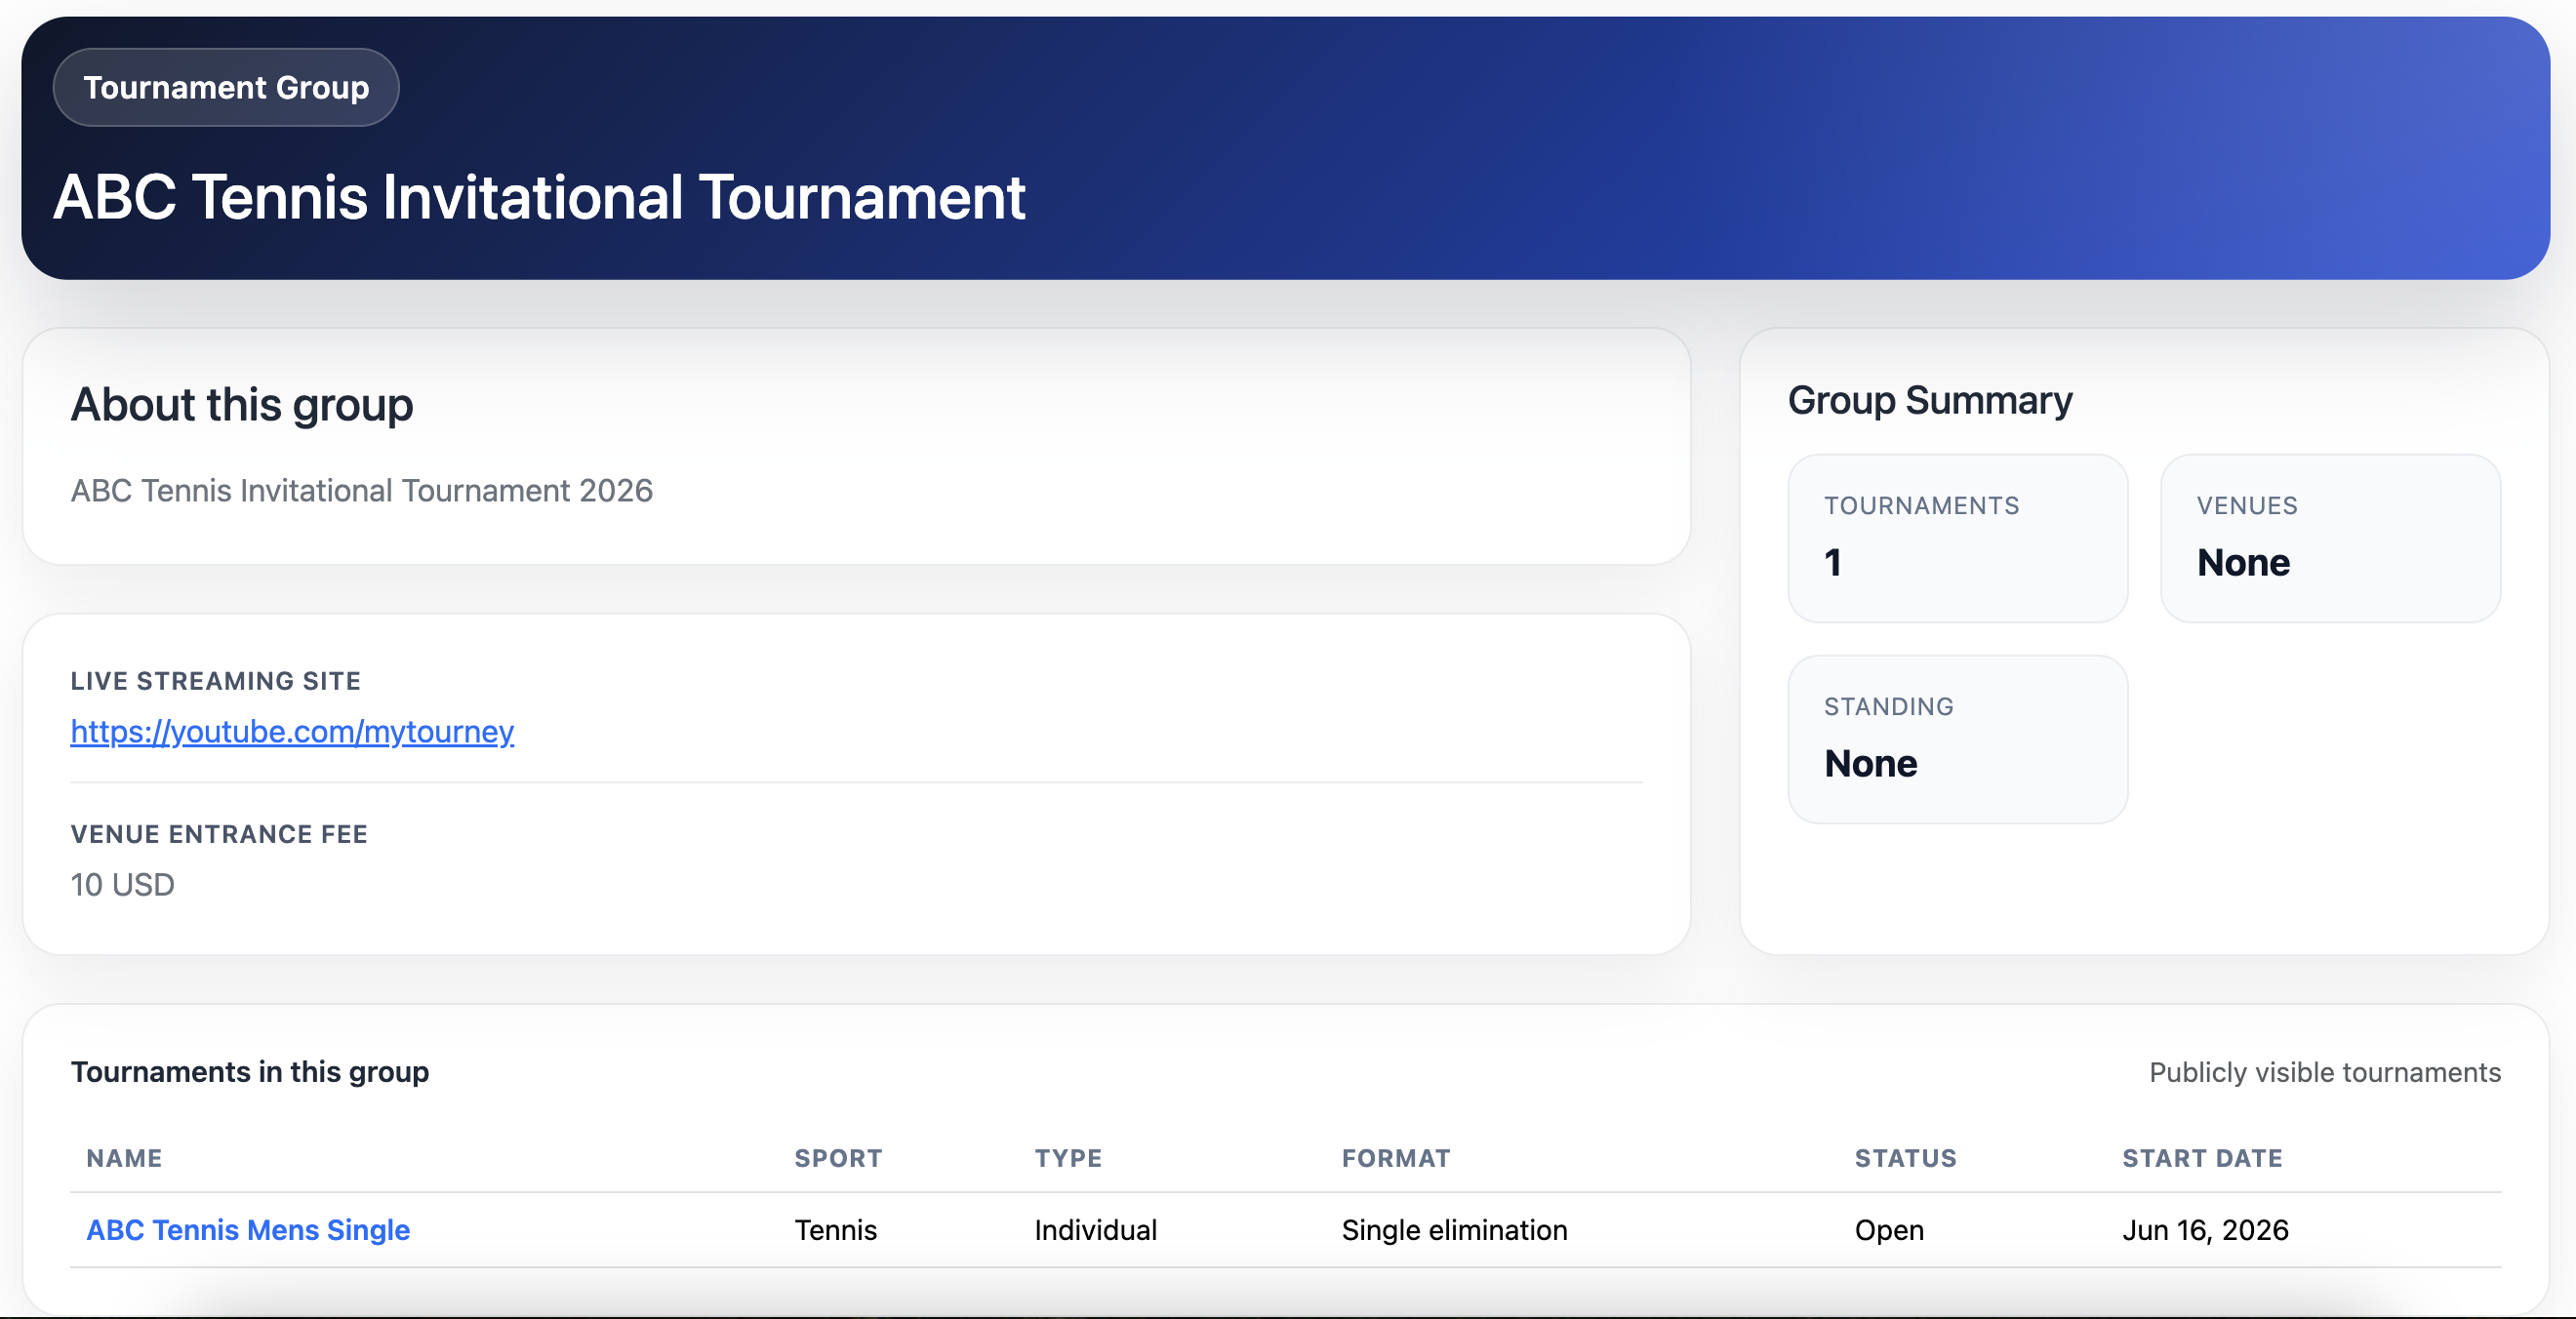
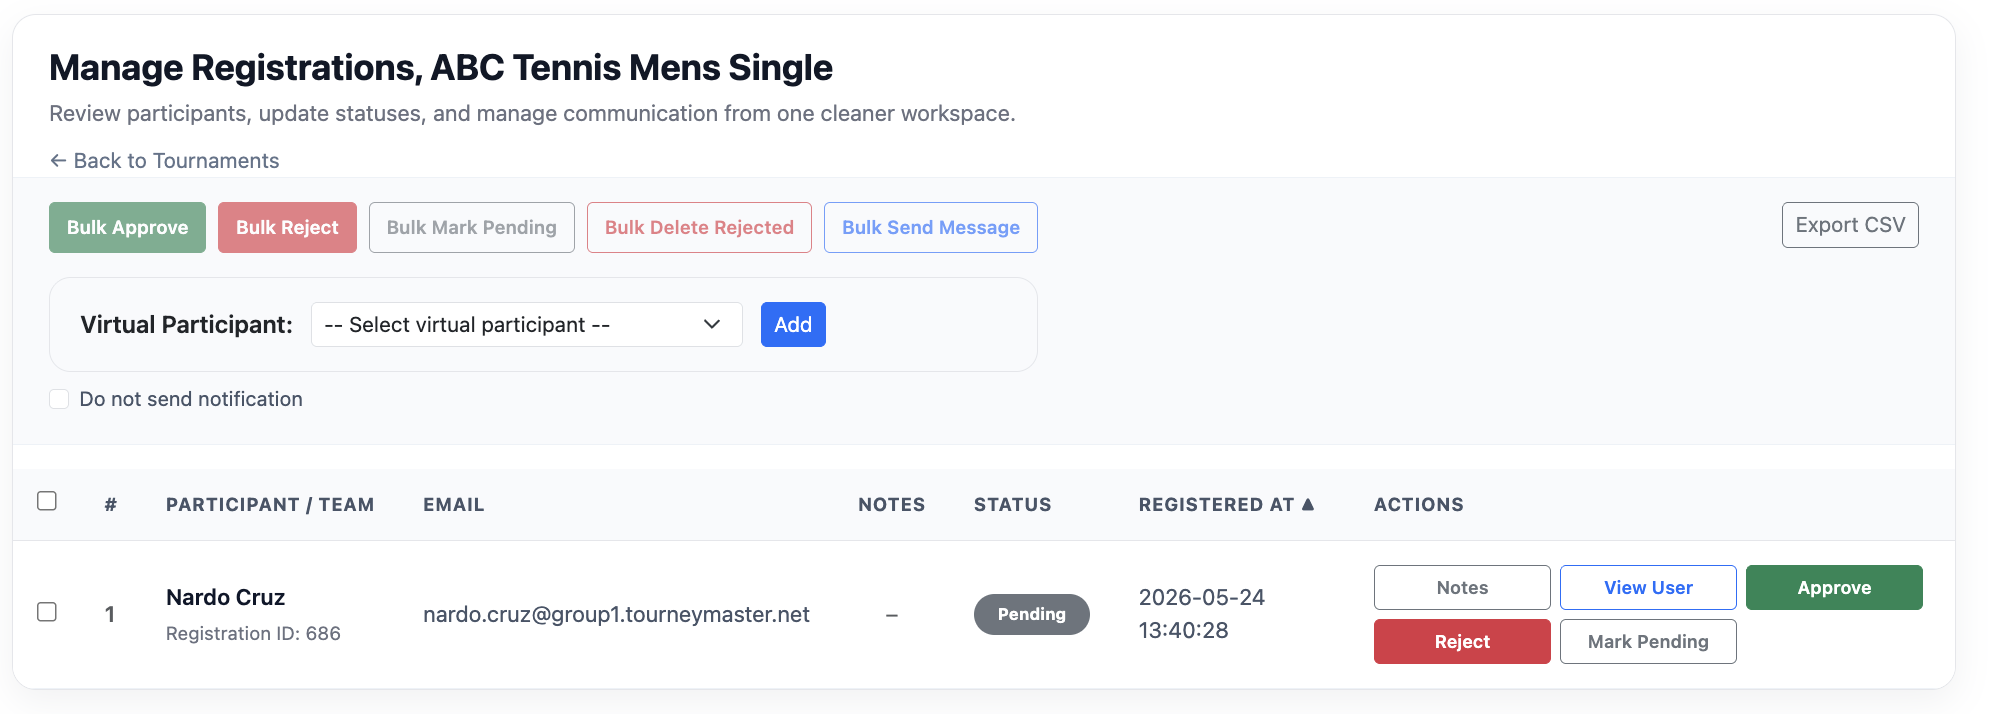
- Go to the tournament Manage Registrations page to approve, reject and view the registration requests. An email is sent to your email address when someone made a request to register to the tournament. When the request is approved or rejected, an email is sent to the participants email address as well.
You can send an email message to participants using the Bulk Message sender as shown below.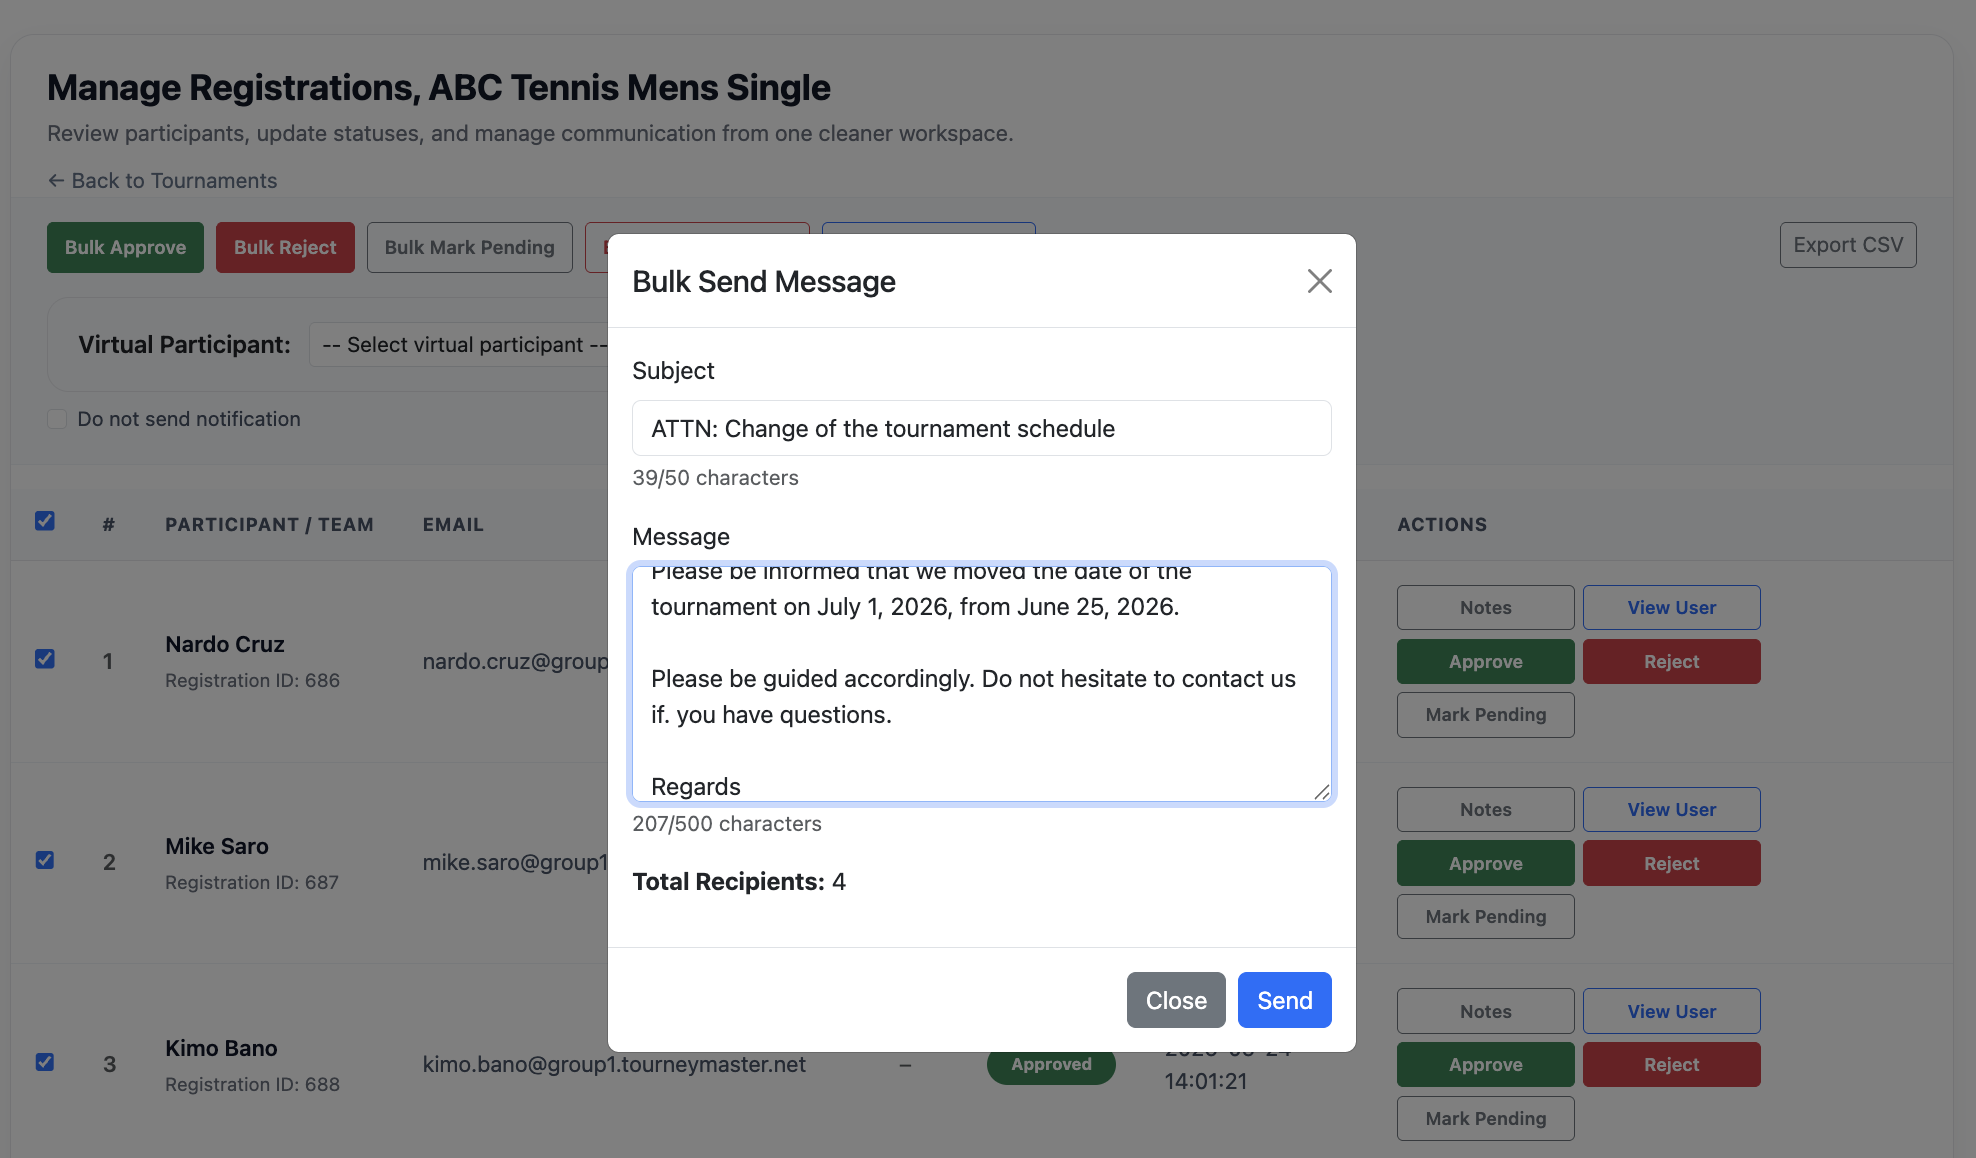
- When the tournament is ready to start or the registration has closed, set the tournament status to Active. Registration is closed once the tournament becomes Active.
- Go to the tournament Manage Bracket page to create the tournament bracket. The bracket contains the matches that will be played by participants based on the tournament format. You can use the bracket creator to automatically generate the matches and bracket for you.
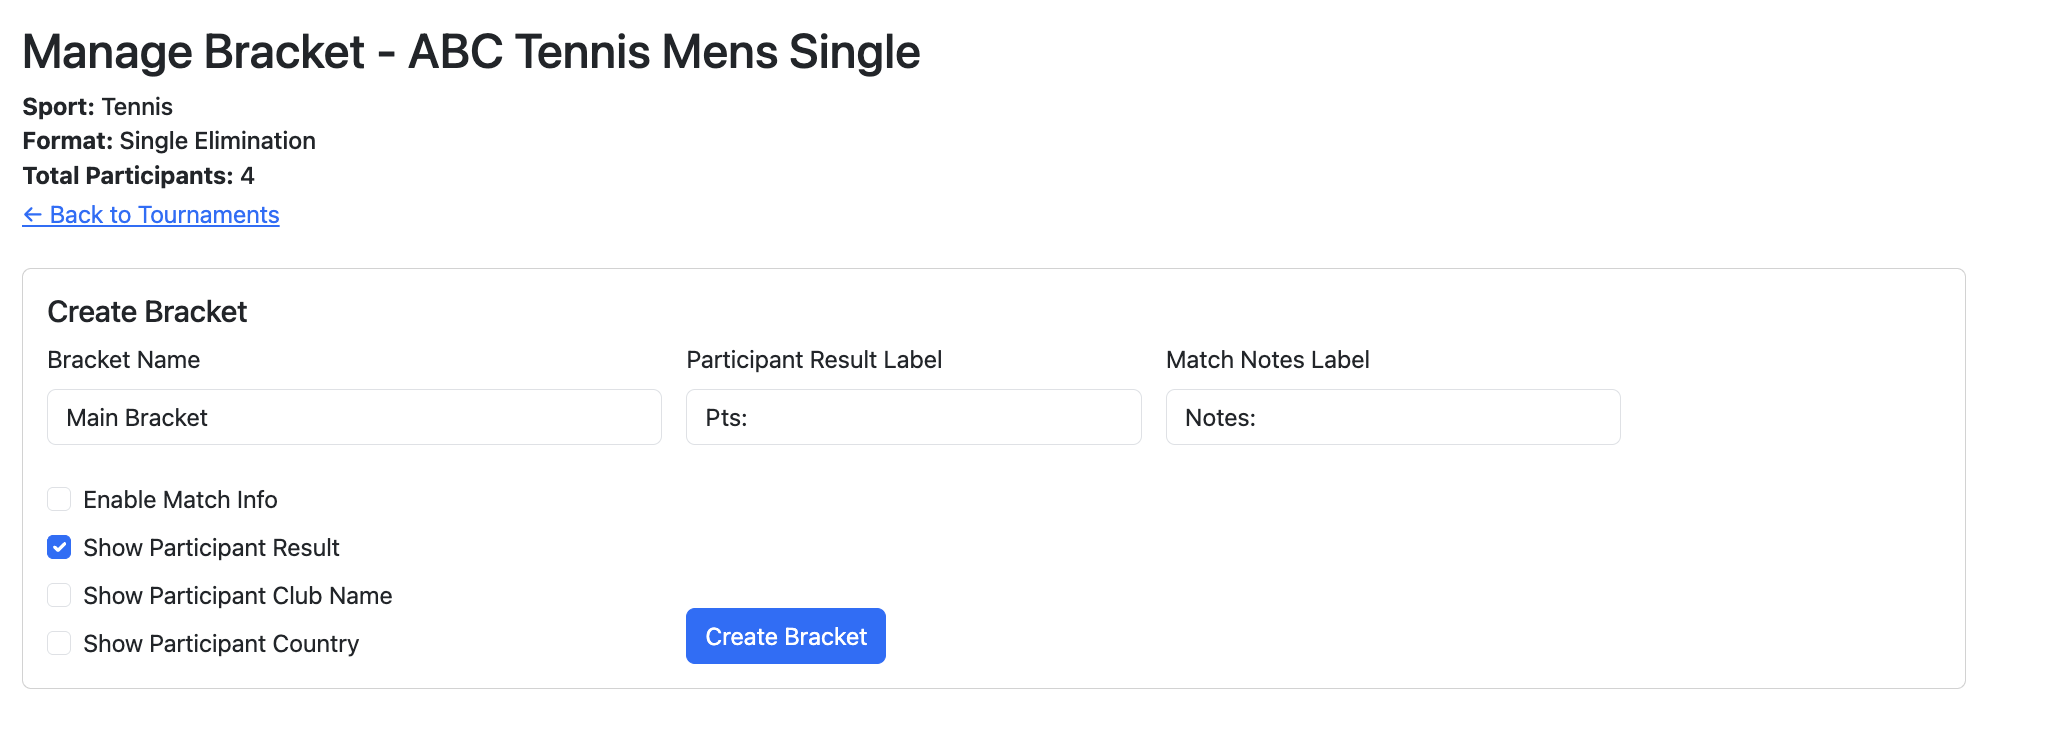
Once the tournament bracket header is created, you can manually create or auto-generate the matches after. If you made a mistake, you can just delete the matches and create/generate them again.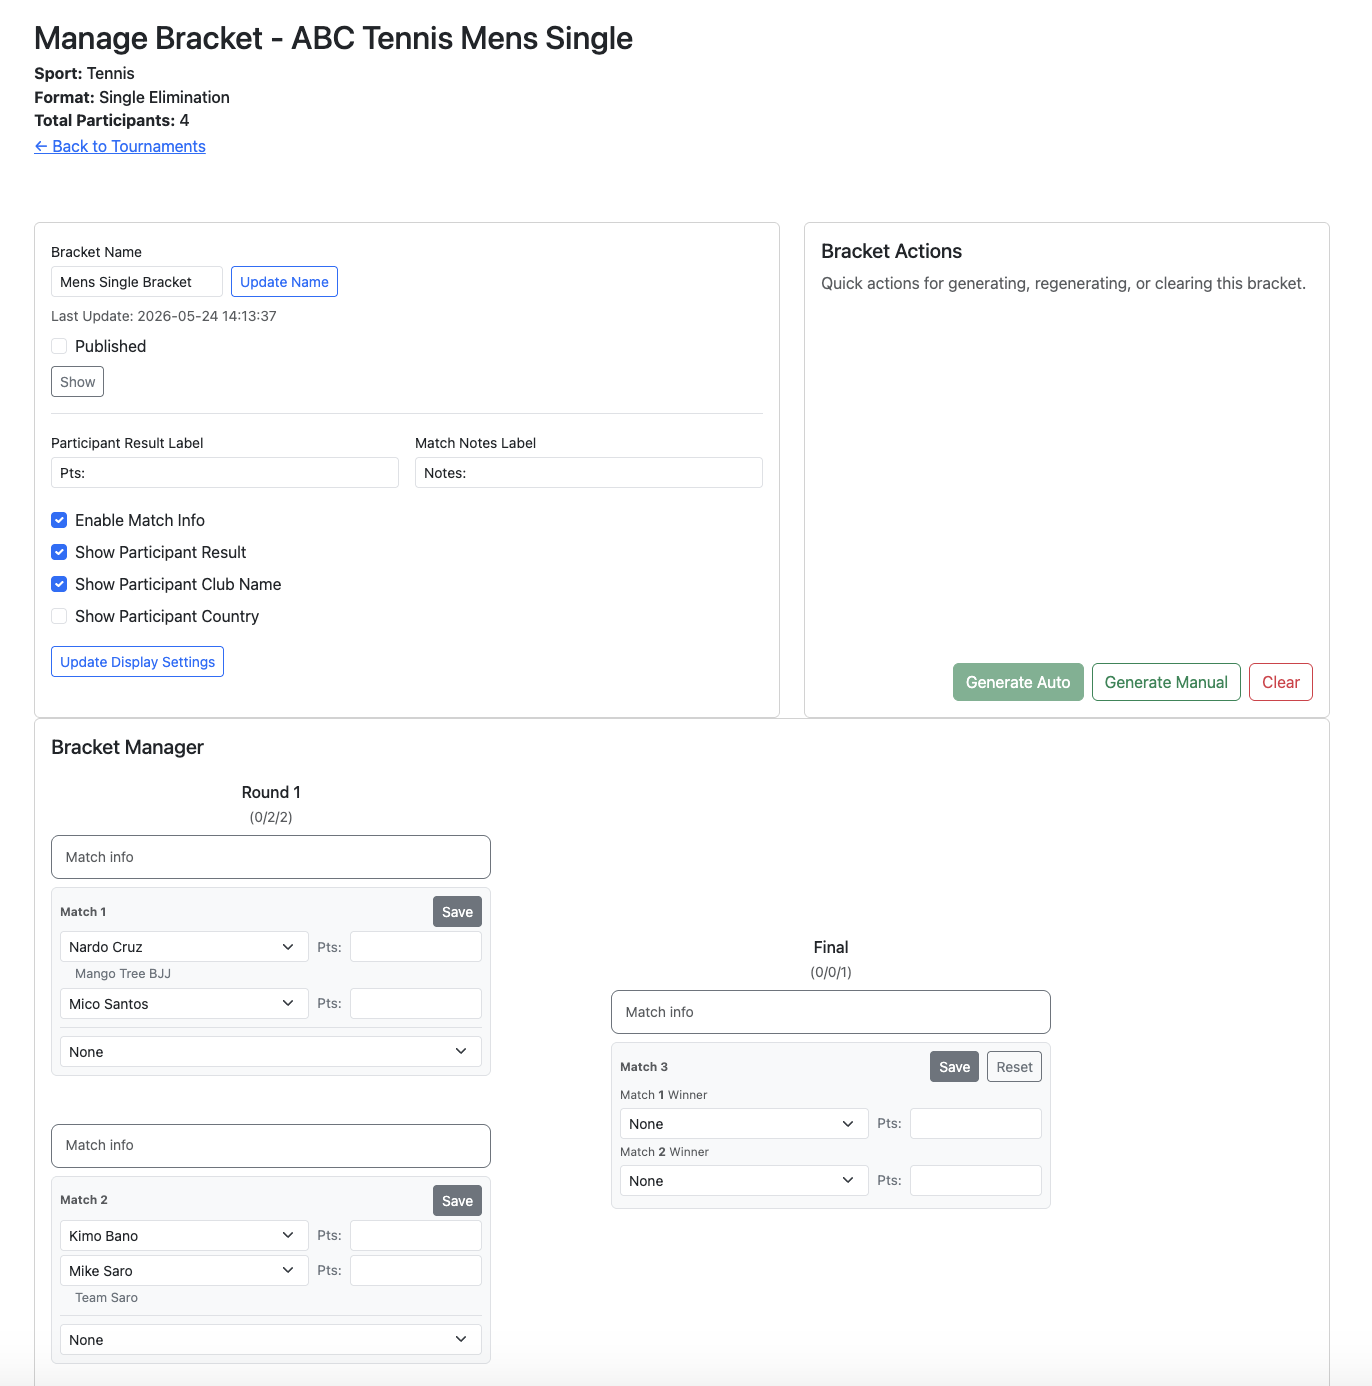
You can add match related information such as number of rounds, time per round, division/category name, referee(s) on the Match Information text box. You can also do this when you create the tournament venue(s).
Once the brackets is ready, you can publish it so that participants can see them. Tick the Published checkbox to publish the tournament bracket.
The tournament bracket will be visible on the tournament landing page as shown below. The brackets are updated with the results when the matches are played.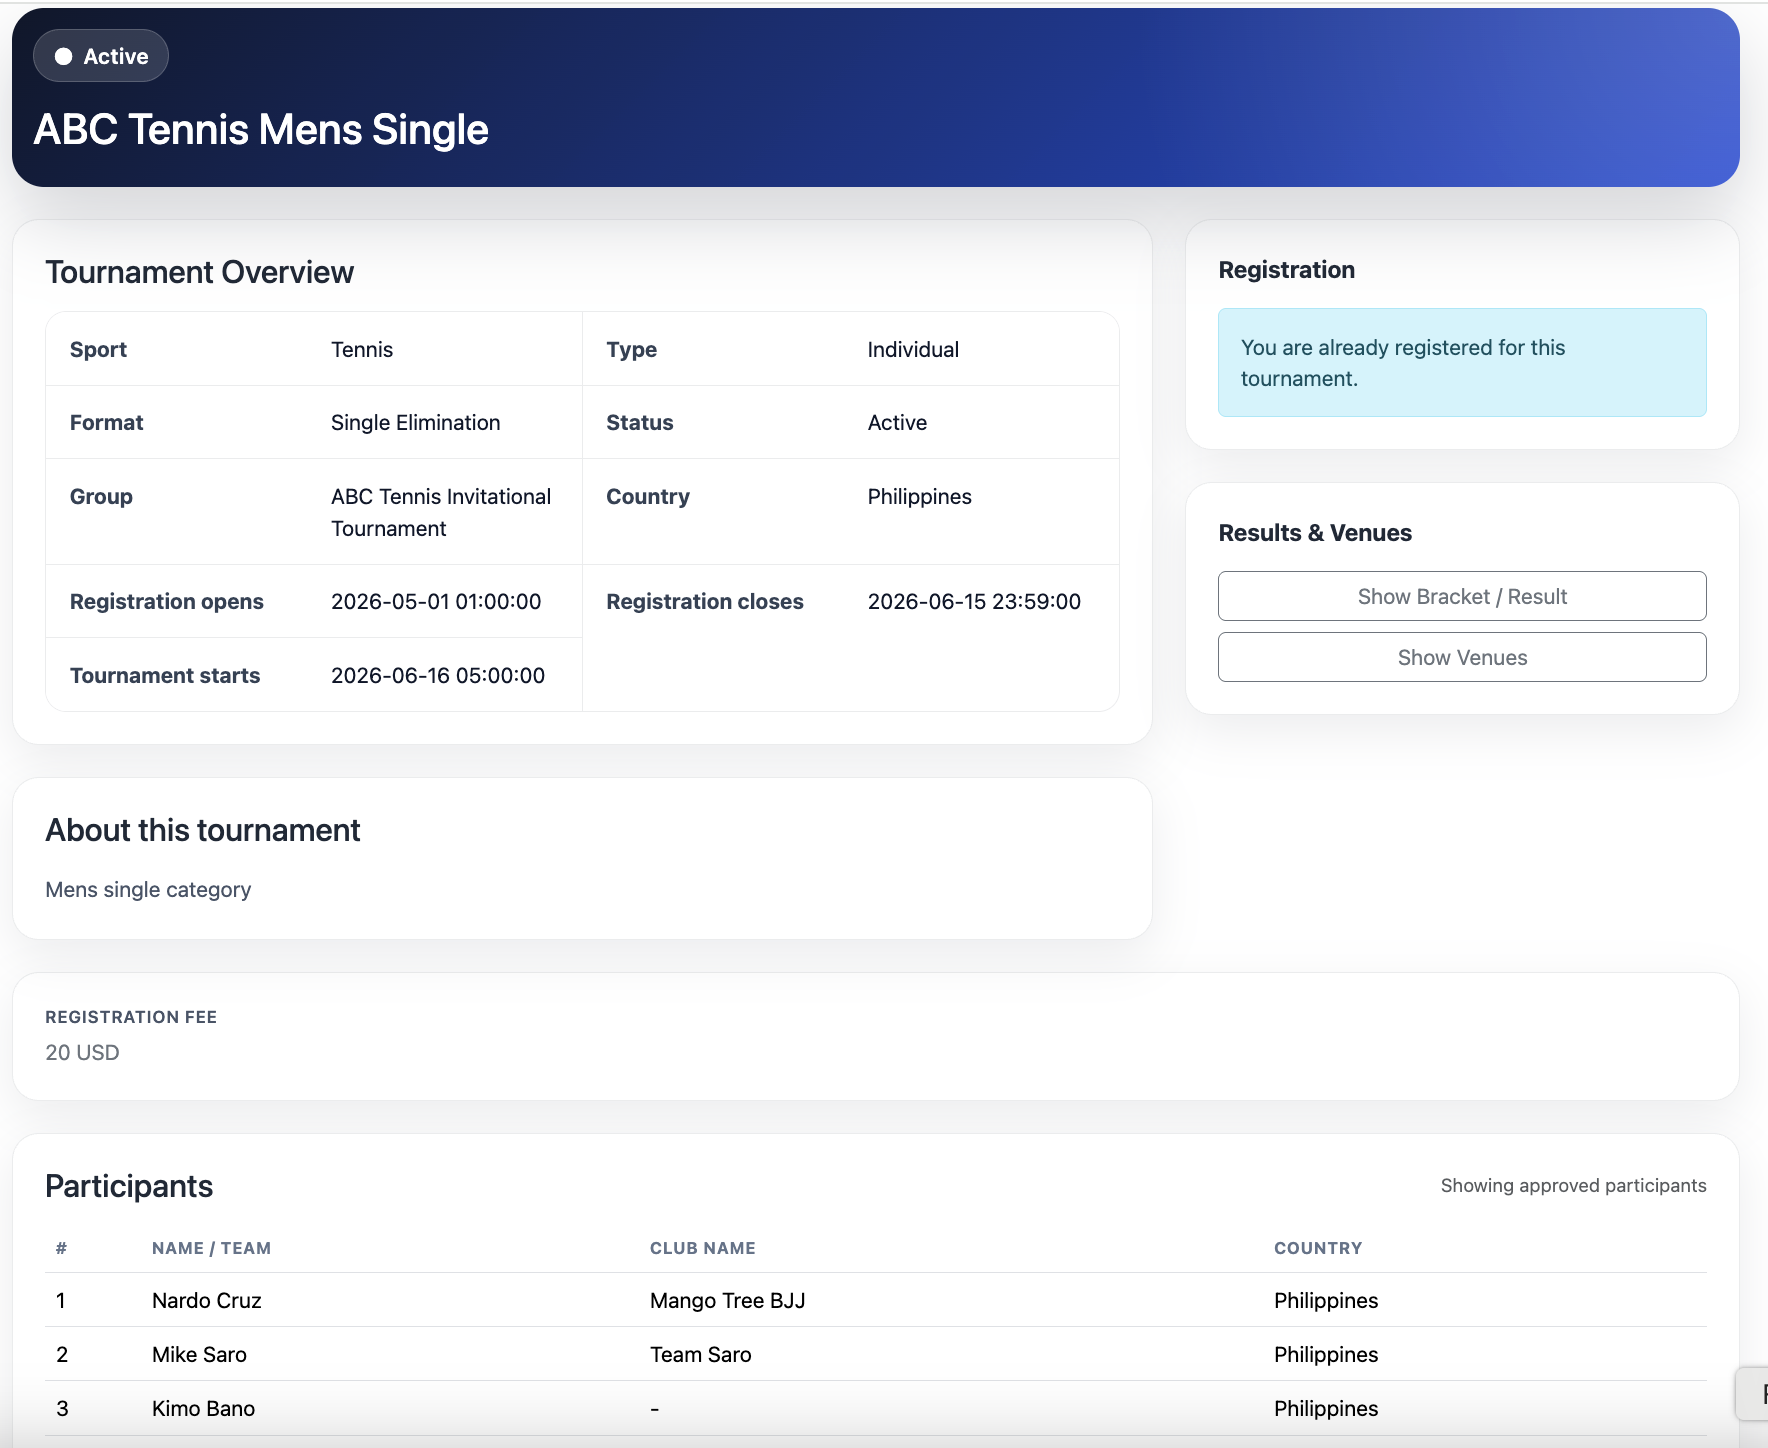
Tournament bracket public view.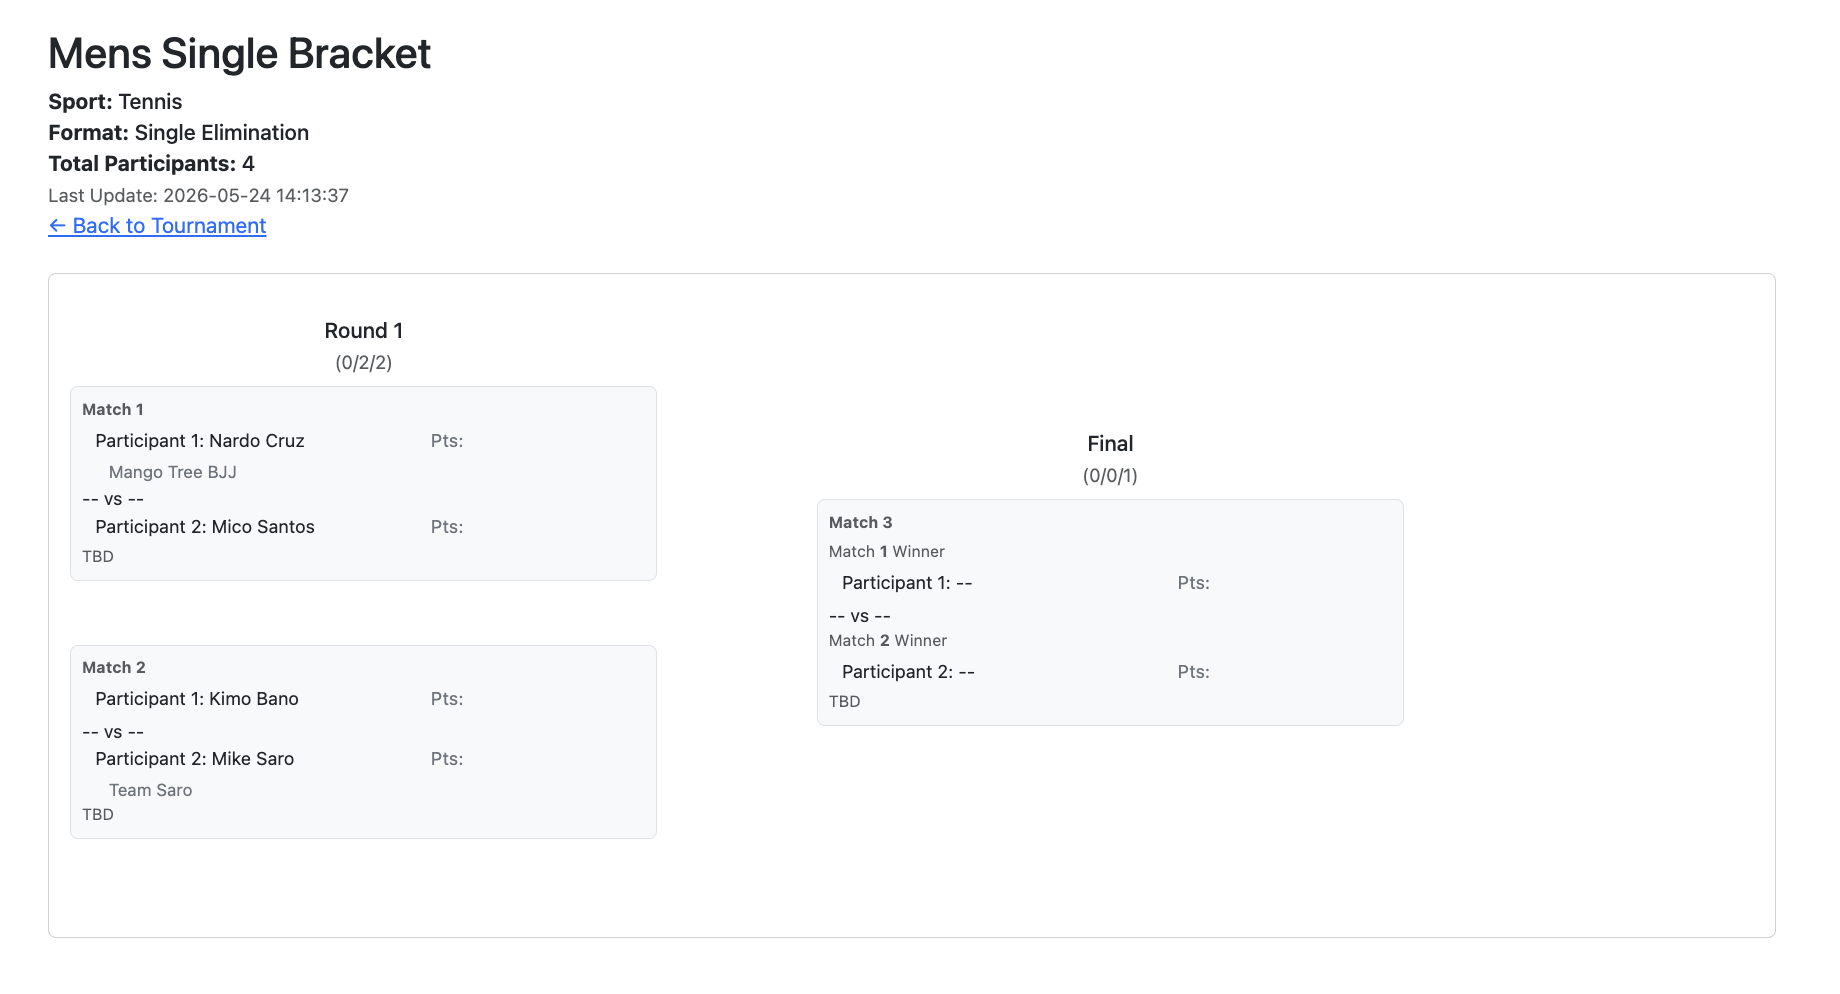
- For some organizers, the tournament venue is optional. But if you have multiple courts, mats or venues where matches are played simultaneously, creating the tournament venues will help a lot in sequencing the matches so they do not overlap (e.g. participants are scheduled to play on multiple matches at the same time). You also use the tournament venue to schedule the matches properly. The matches on the tournament venue are shown and ordered on a single column so they are easier to follow.
The tournament venues can be created in the tournament group or in the tournament itself. Ideally, you should create it in the tournament group so you can assign matches from multiple tournaments in that group. The Tournament Director and Online Scoreboard use the tournament group venues. So if you want to use the Tournament Director and the Online Scoreboard you must create the tournament venues as well.
Go to the tournament group Manage Venue page to create the tournament venues and assign matches to each venue. The venue corresponds to the tournament area where matches are held. Sequence the matches accordingly. Bad sequencing can lead to overlapping matches. Participants use the tournament venue to determine when and where their matches are going to take place.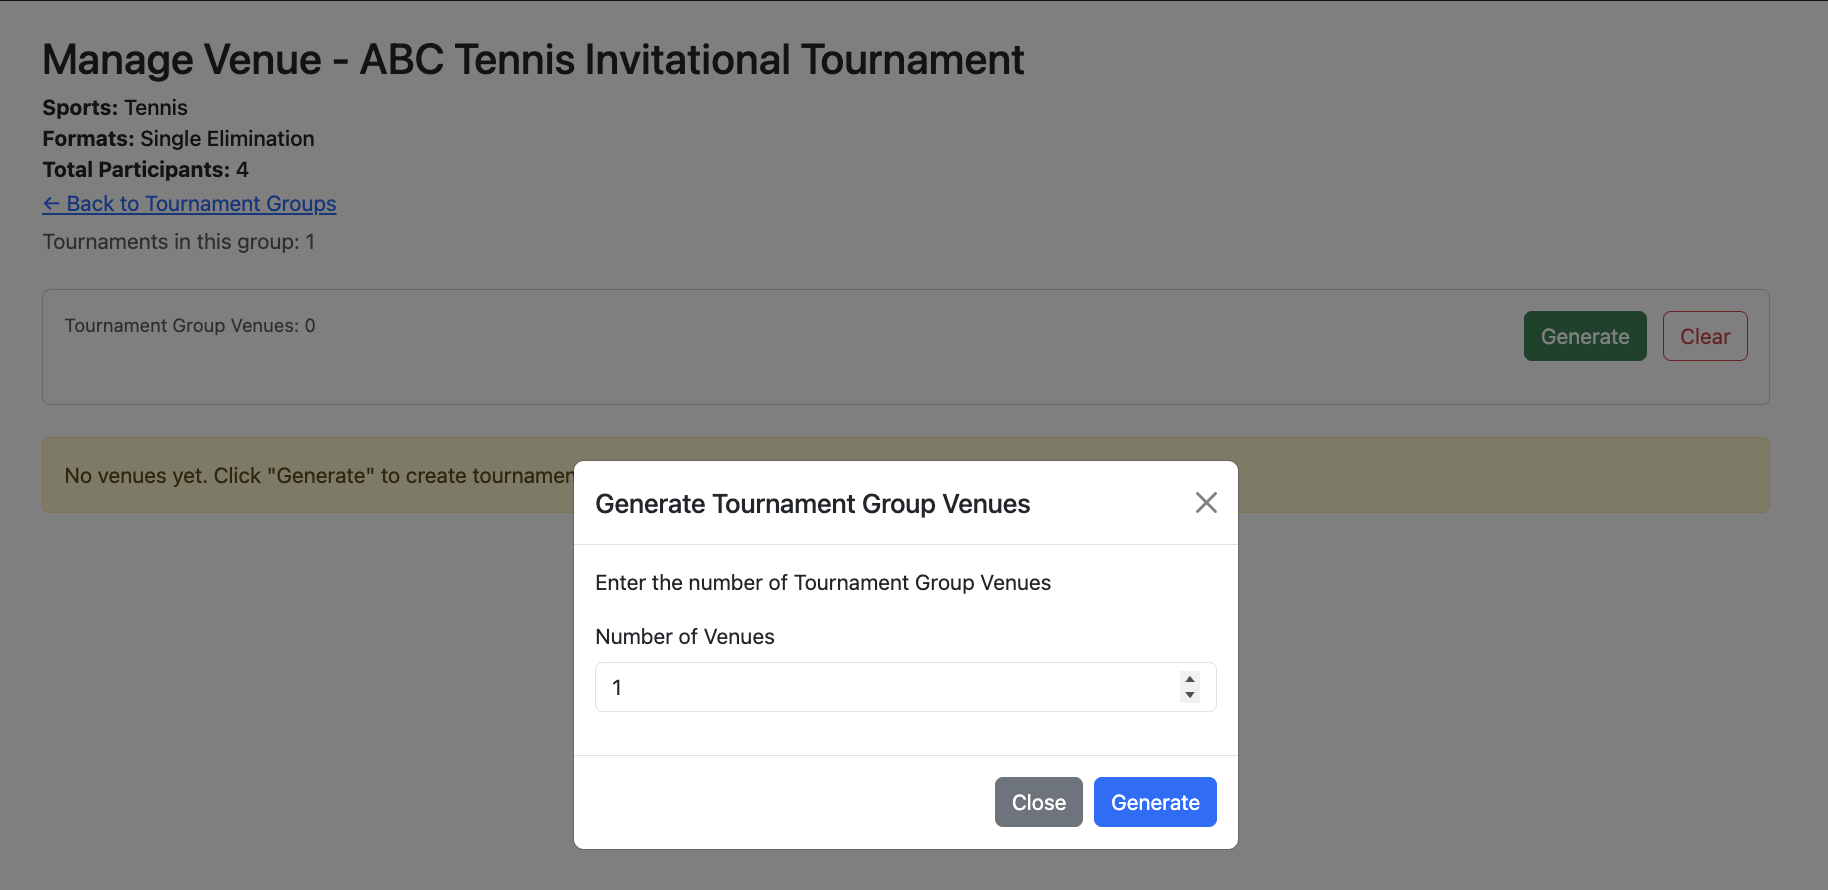
Add the matches from the tournaments under the tournament group.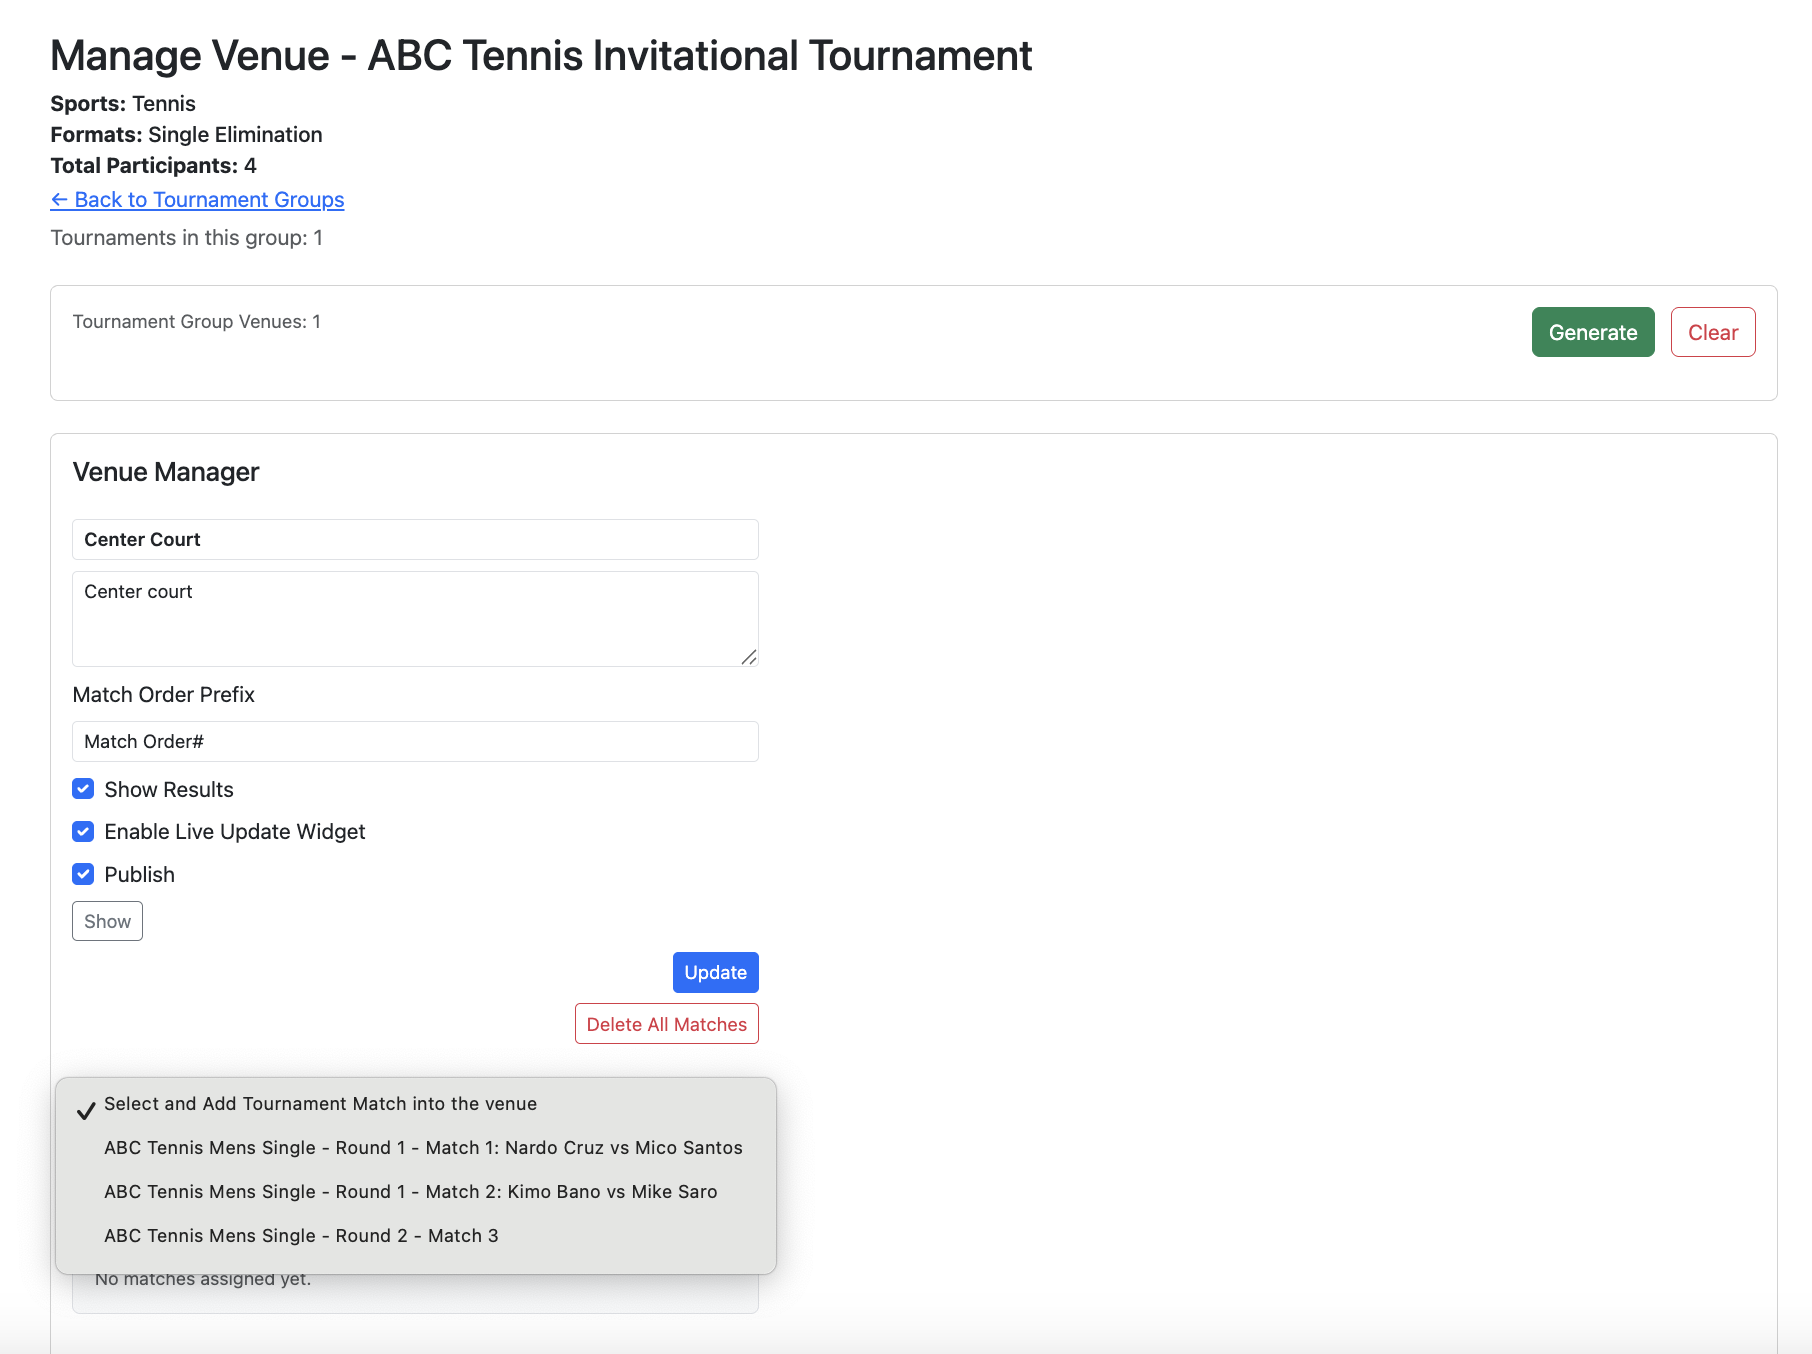
Matches on the tournament venue are assigned with a unique Match Order Number. This number is used to identify a particular match within the tournament venue. Please note that this number is different from the Match ID in the tournament bracket.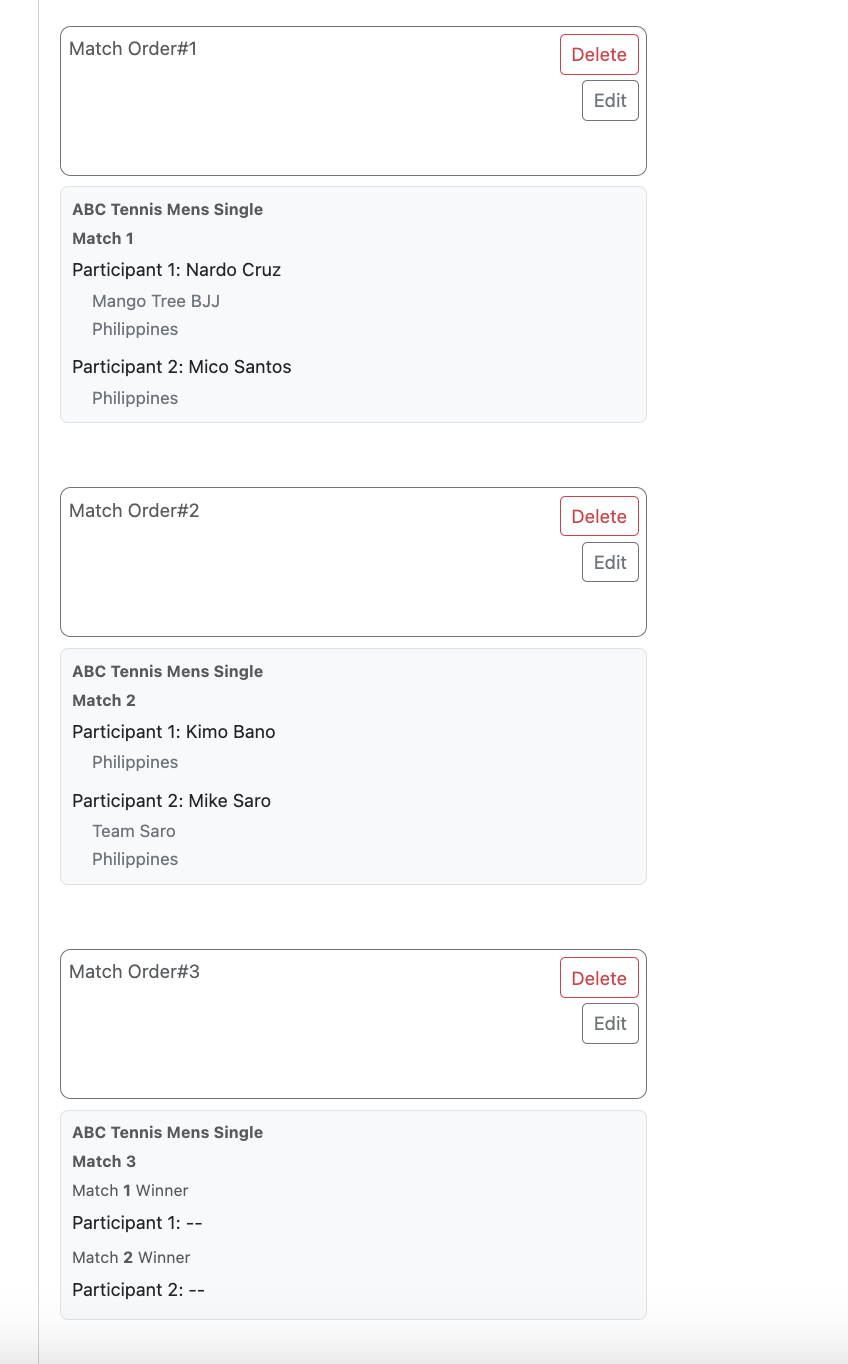
Tick the "Publish" checkbox to make the tournament venue visible to the public. The tournament venue will be shown like below.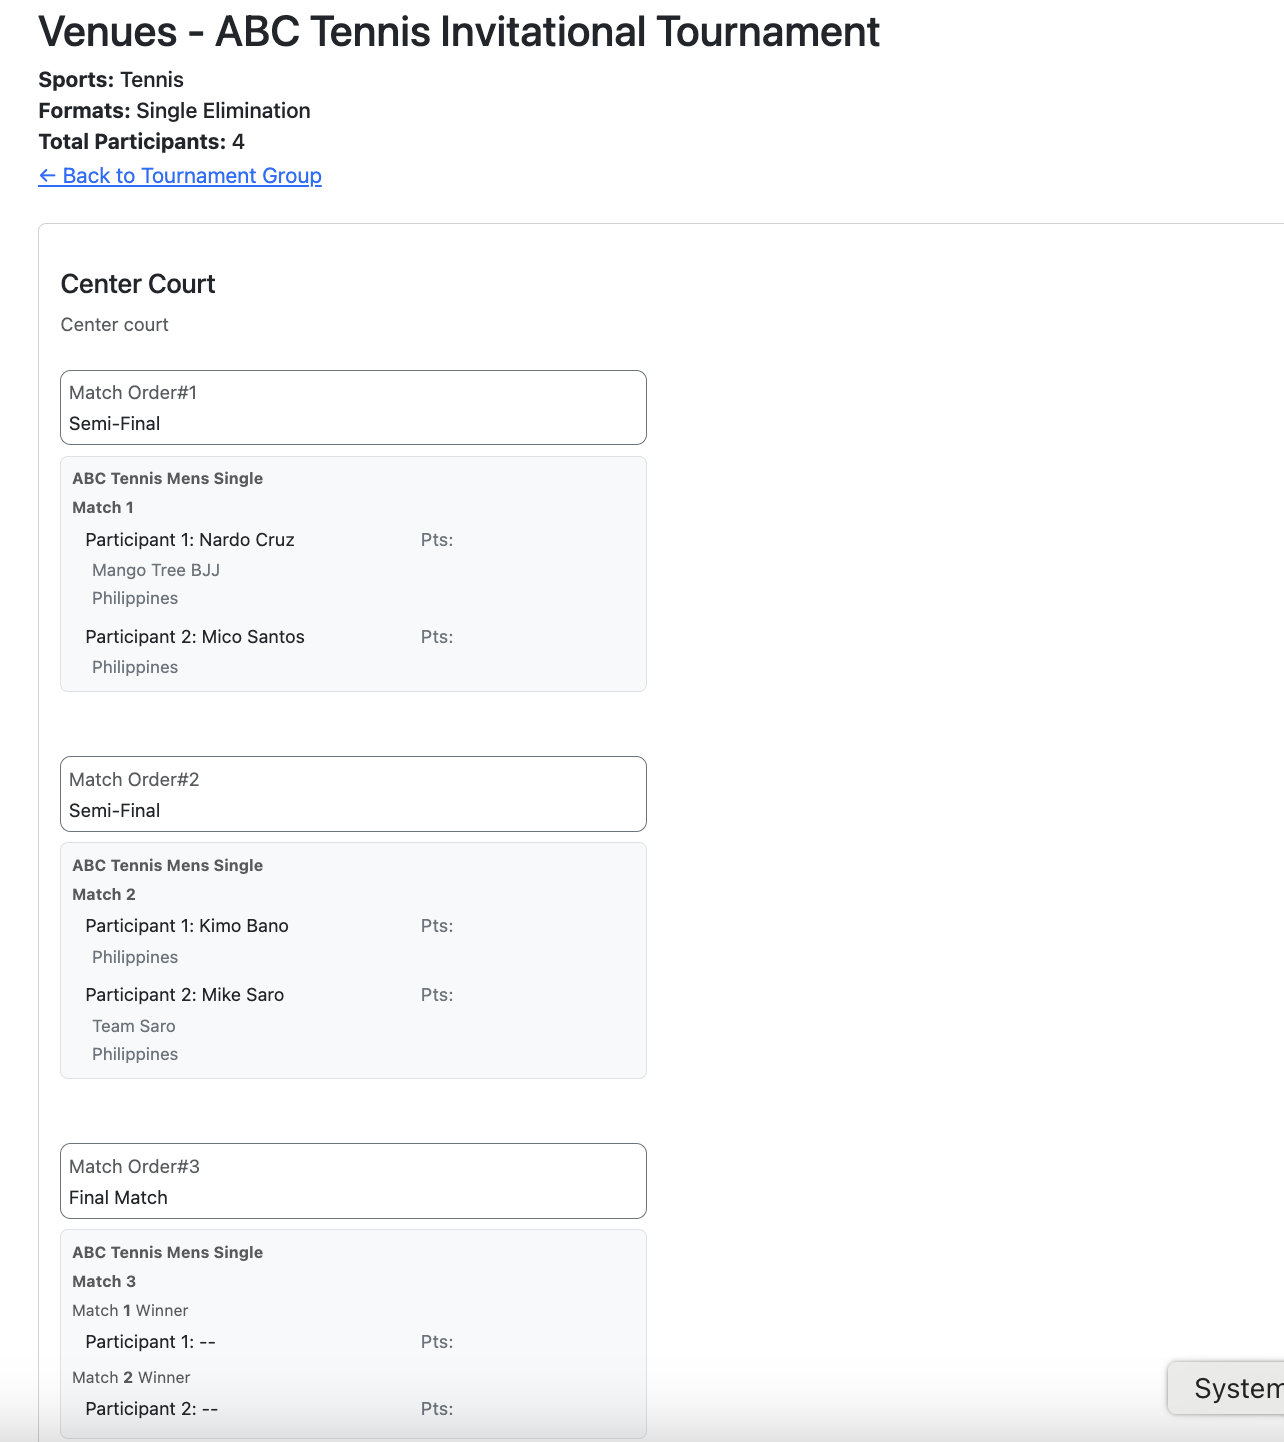
- Everything is set as this point! The games or matches is ready to begin!
The succeeding steps will happen on the day of the tournament. - Go to the tournament group Venue Director page. Switch to the designated venue and click Start.
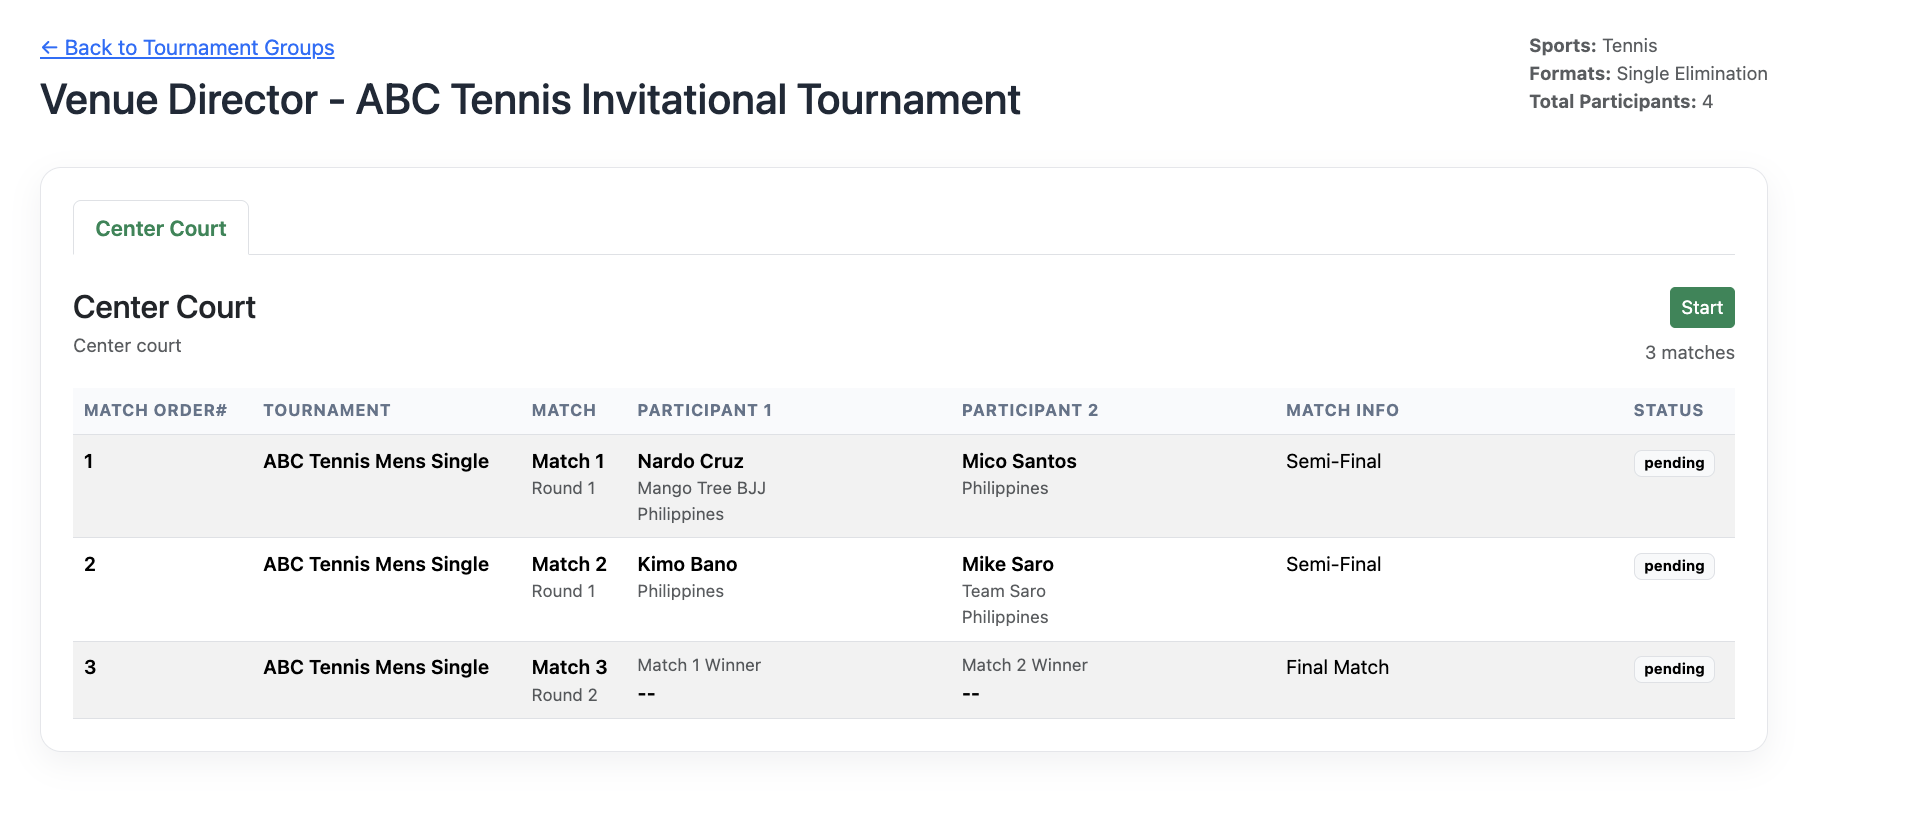
Select the desired Type on the Tournament Director Runner.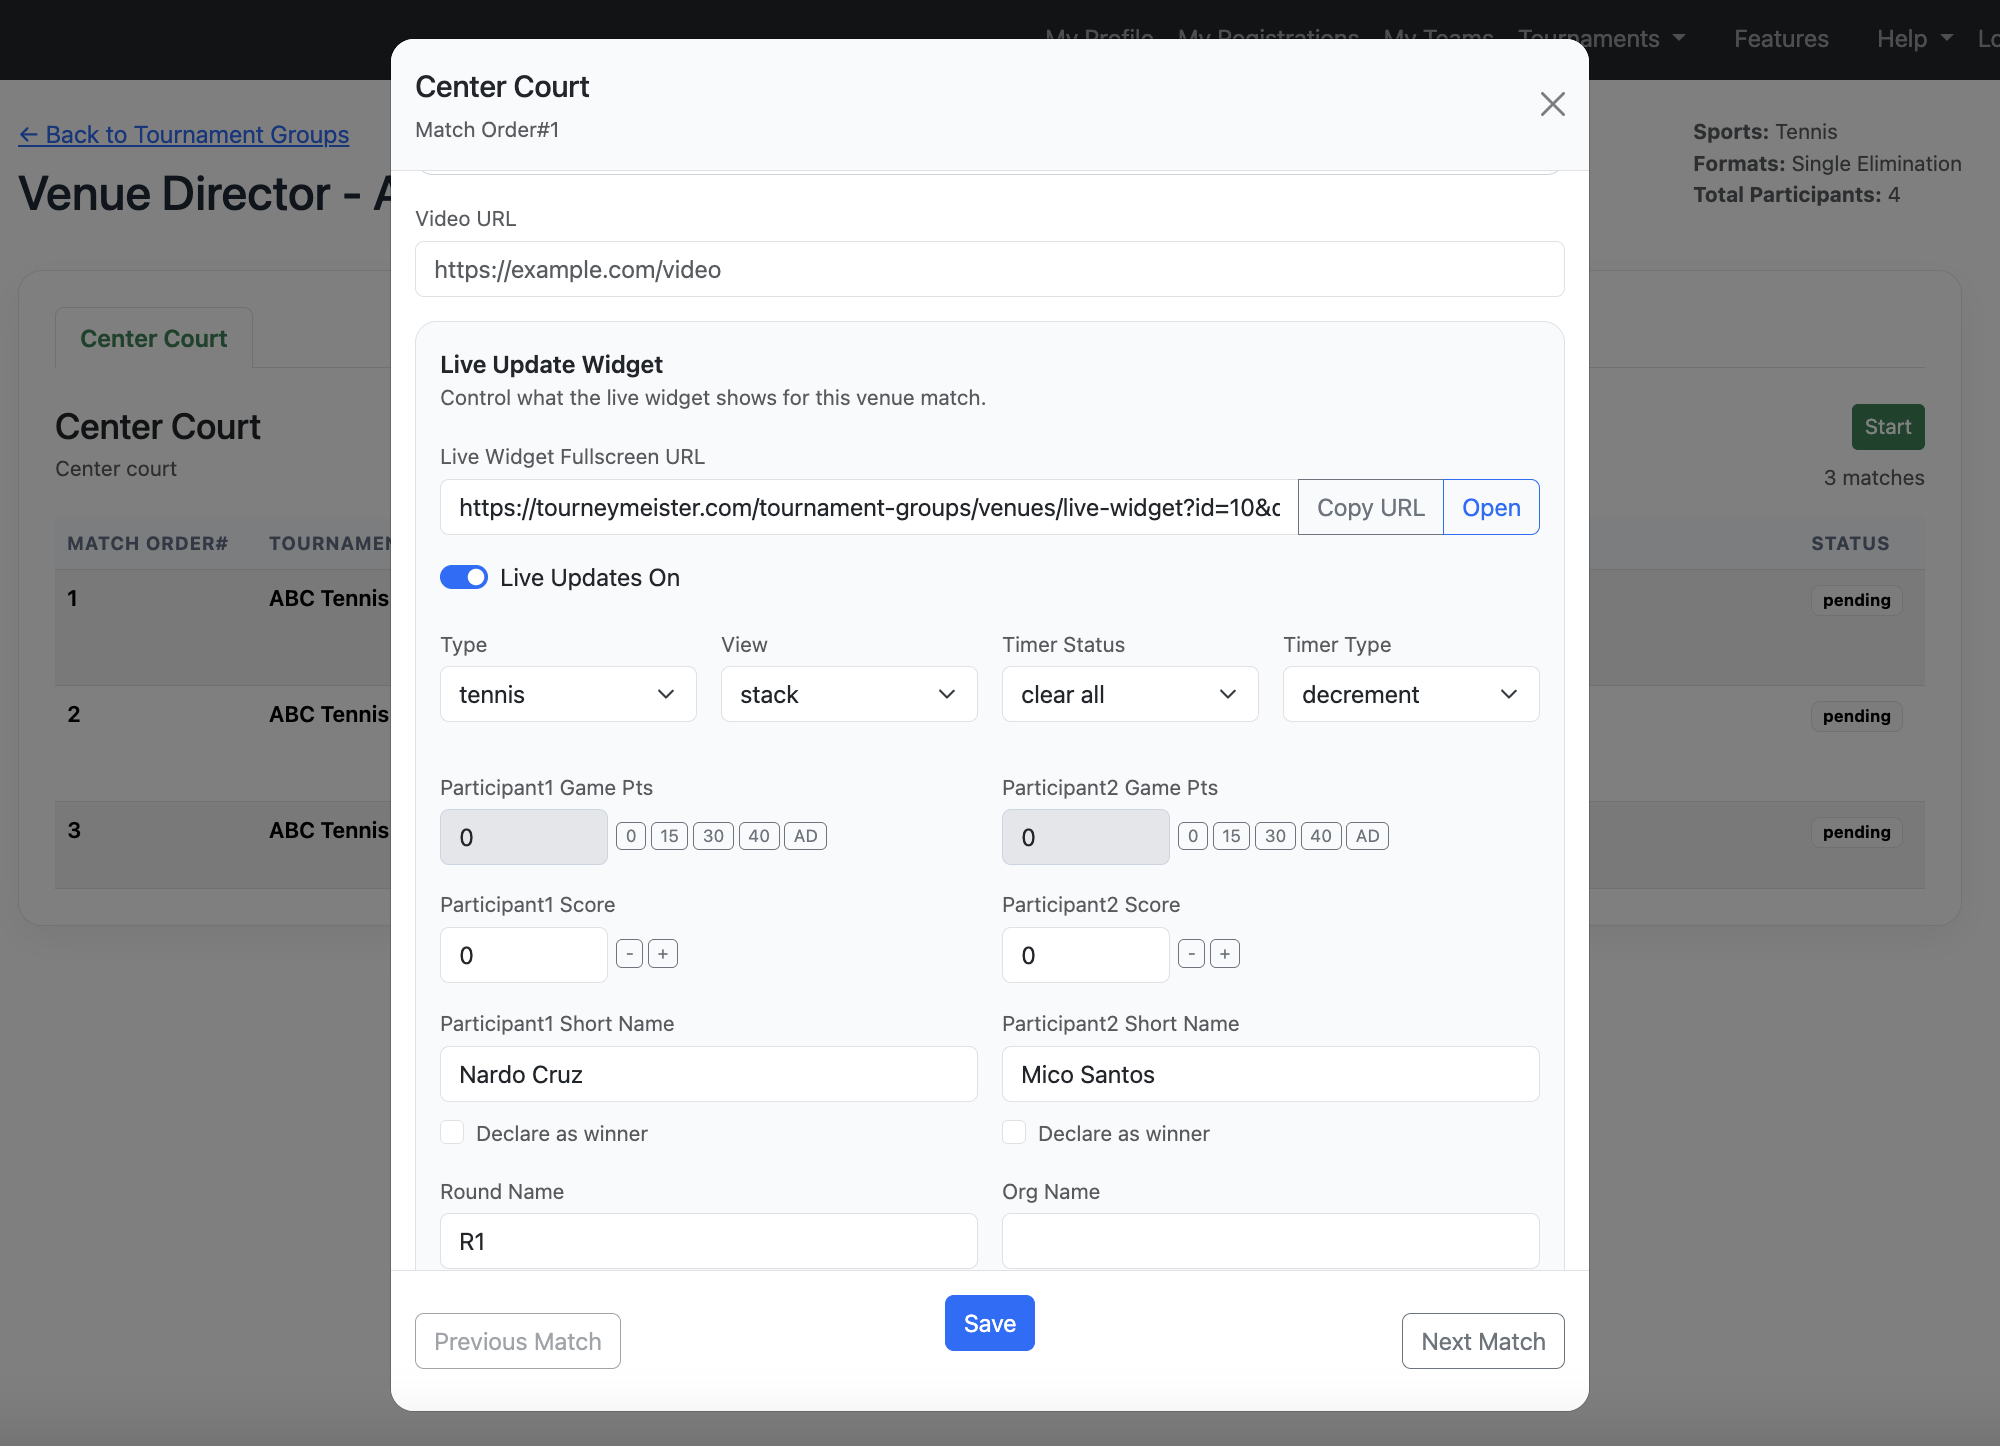
- The matches will be played in sequence. Update the match result (e.g. participant scores) and finally select the winner. The result will be reflected on the tournament bracket and venue instantly.
Continue to the next match until all the matches are played. - Go to the tournament group Manage Standing page to generate, publish and update the participants standing. You can also designate the winners on each tournament from the tournament Honor Roll page. For instance you designate the participants who took the Gold, Silver and Bronze.
You can do this in the middle of the tournament to provide instant and regular updates. - At this point all the matches are played. You can use the result from #12 to award winners.